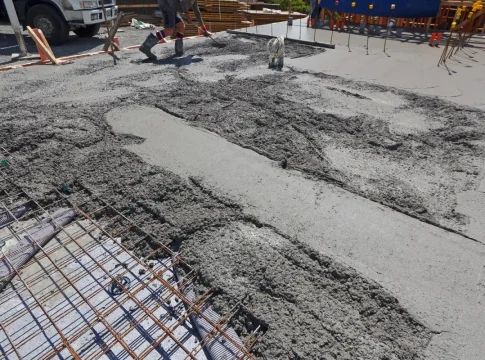
If planning to construct a patio, storage shed, patio cover or carport, one thing to bear in mind is the concrete slab you will use. With appropriate planning, the process of pouring out concrete slab should not be a daunting task.
Some of the tools required for the process include a tape measure, mason’s string, steel wire mesh, laser or 4 level, hammer, wooden stakes, saw, level, trowel, shovel, bucket, and wheelbarrow among others. The pouring process involves other procedures which include:
- Concrete formulation
- Concrete slab designing
- Concrete slab pouring
- Concrete slab finishing and troweling

Before pouring out the concrete slab
- Determine the size and location of the site; this requires laying out the location of the slab. Make stakes at the corners of the site then connect them together using strings. The slab boundary should be square then make necessary adjustments.
- Prepare the form that will come in handy in keeping the concrete in the right place when drying and making a finishing to the slab.
- Mix the concrete with water following the right ratio then stir until it mixes completely and make sure it has the correct consistency.
- Then pour the concrete inside the form and fill it. Level the concrete using the edge of a 2×4 stud. Pull and push the edge to and fro over the top of the form a process referred to as the screed.
- Float the poured concrete with a bull float as this smoothens the surface and also embeds large aggregates. The floating also enables water to go up to the concrete surface.
- Immediately the water dries up, finish the slab to a level and smooth surface then leave it to dry up for some days.
Alternatively, facilities for tool rental and outlets for home improvement normally rent out transferable cement mixers. You can position the chute for the cement mixer in order to pour concrete on the form. A shovel comes in handy when pushing the concrete so that it spreads out on all areas evenly. Always be ready to work swiftly with concrete as it sets up fast. Fill in all corners and fill the form edges. Before pouring out the concrete slab, always make sure the ground is dry and check out the weather to ensure it does not rain when the concrete is drying. To avoid air pockets, ensure the ground is flat before pouring the concrete. Pouring concrete slabs is a manageable task if the right procedure is followed.
If planning to construct a patio, storage shed, patio cover or carport, one thing to bear in mind is the concrete slab you will use. With appropriate planning, the process of pouring out concrete slab should not be a daunting task.
Some of the tools required for the process include a tape measure, mason’s string, steel wire mesh, laser or 4 level, hammer, wooden stakes, saw, level, trowel, shovel, bucket, and wheelbarrow among others. The pouring process involves other procedures which include:
- Concrete formulation
- Concrete slab designing
- Concrete slab pouring
- Concrete slab finishing and troweling

Before pouring out the concrete slab
- Determine the size and location of the site; this requires laying out the location of the slab. Make stakes at the corners of the site then connect them together using strings. The slab boundary should be square then make necessary adjustments.
- Prepare the form that will come in handy in keeping the concrete in the right place when drying and making a finishing to the slab.
- Mix the concrete with water following the right ratio then stir until it mixes completely and make sure it has the correct consistency.
- Then pour the concrete inside the form and fill it. Level the concrete using the edge of a 2×4 stud. Pull and push the edge to and fro over the top of the form a process referred to as the screed.
- Float the poured concrete with a bull float as this smoothens the surface and also embeds large aggregates. The floating also enables water to go up to the concrete surface.
- Immediately the water dries up, finish the slab to a level and smooth surface then leave it to dry up for some days.
Alternatively, facilities for tool rental and outlets for home improvement normally rent out transferable cement mixers. You can position the chute for the cement mixer in order to pour concrete on the form. A shovel comes in handy when pushing the concrete so that it spreads out on all areas evenly. Always be ready to work swiftly with concrete as it sets up fast. Fill in all corners and fill the form edges. Before pouring out the concrete slab, always make sure the ground is dry and check out the weather to ensure it does not rain when the concrete is drying. To avoid air pockets, ensure the ground is flat before pouring the concrete. Pouring concrete slabs is a manageable task if the right procedure is followed.

