
Screen doors are a fantastic addition to any home, providing a welcome dose of fresh air and natural light while keeping pesky insects at bay. They also add a touch of charm and character to your home’s exterior. While purchasing a pre-made screen door is an option, building your own allows for customization and can be a rewarding DIY project.
This comprehensive guide will walk you through every step of building a screen door, from selecting the right materials to installation. Whether you’re a seasoned DIYer or a complete beginner, this guide will equip you with the knowledge and confidence to tackle this project successfully.
Benefits of Building Your Own Screen Door
There are several compelling reasons to consider building your own screen door rather than buying one:
- Customization: When you build your own screen door, you have complete control over the design, size, and materials. You can tailor the door to perfectly match your home’s style and existing doors.
- Cost-effective: Building your own screen door can be significantly cheaper than purchasing a pre-made door, especially if you already have some of the necessary materials on hand.
- Sense of accomplishment: There’s a deep sense of satisfaction that comes from completing a DIY project like building a screen door. You’ll not only save money but also gain the pride of knowing you built something functional and beautiful for your home.
- Quality control: By building your own screen door, you can ensure that it’s constructed with high-quality materials and craftsmanship.
Materials Gathering
Before diving into the construction process, it’s crucial to gather all the necessary materials. Here’s a comprehensive list of everything you’ll need:
- Wood: Select a type of wood that is suitable for outdoor use. Pressure-treated pine is a popular and affordable choice, but cedar, redwood, or composite lumber are also viable options. Choose lumber with a thickness of 1 inch (2.54 cm) for the frame and 1/2 inch (1.27 cm) for the rails and stiles. The amount of wood will depend on the dimensions of your door opening.
- Wood screws: You’ll need various lengths of wood screws for assembling the frame and attaching the hardware.
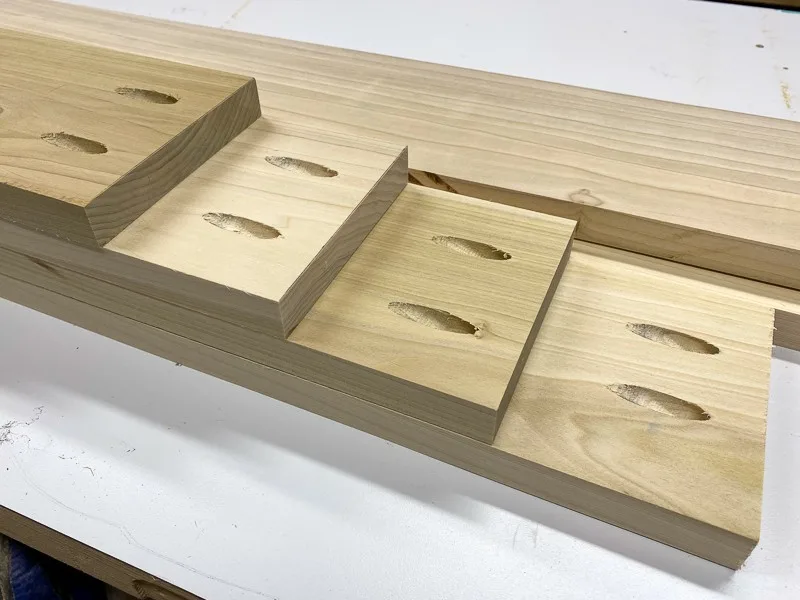
- Pocket hole jig (optional): While not essential, a pocket hole jig can significantly simplify the frame assembly process.
- Kreg Jig screws (optional, if using a pocket hole jig): These specialized screws are designed for use with pocket hole jigs.
- Wood glue: Opt for a high-quality wood glue suitable for exterior applications.
- Carpenter’s saw: A miter saw or circular saw will be ideal for cutting the wood pieces to size.
- Sandpaper: Various grits of sandpaper will be needed for smoothing rough edges and prepping the wood for painting.
- Primer: Choose a primer suitable for exterior wood.
- Paint: Select a high-quality exterior paint in your desired color.
- Door screen: Purchase a roll of screen mesh that is large enough to cover the entire door opening.
- Spline: Spline is a thin, flexible material used to secure the screen mesh to the frame.
- Staple gun: A staple gun is necessary for attaching the spline to the frame.
- Door hinges: Select two hinges suitable for exterior doors and the weight of your screen door.
- Screwdriver: You’ll need a screwdriver to install the hinges and other hardware.
- Level: A level is essential for ensuring that the screen door is hung straight.
- Door handle (optional): Choose a handle or knob that complements the style of your screen door.
- Safety glasses: Always wear safety glasses when working with power tools.
- Dust mask: A dust mask is recommended to protect yourself from inhaling sawdust.
Measuring the Door Opening
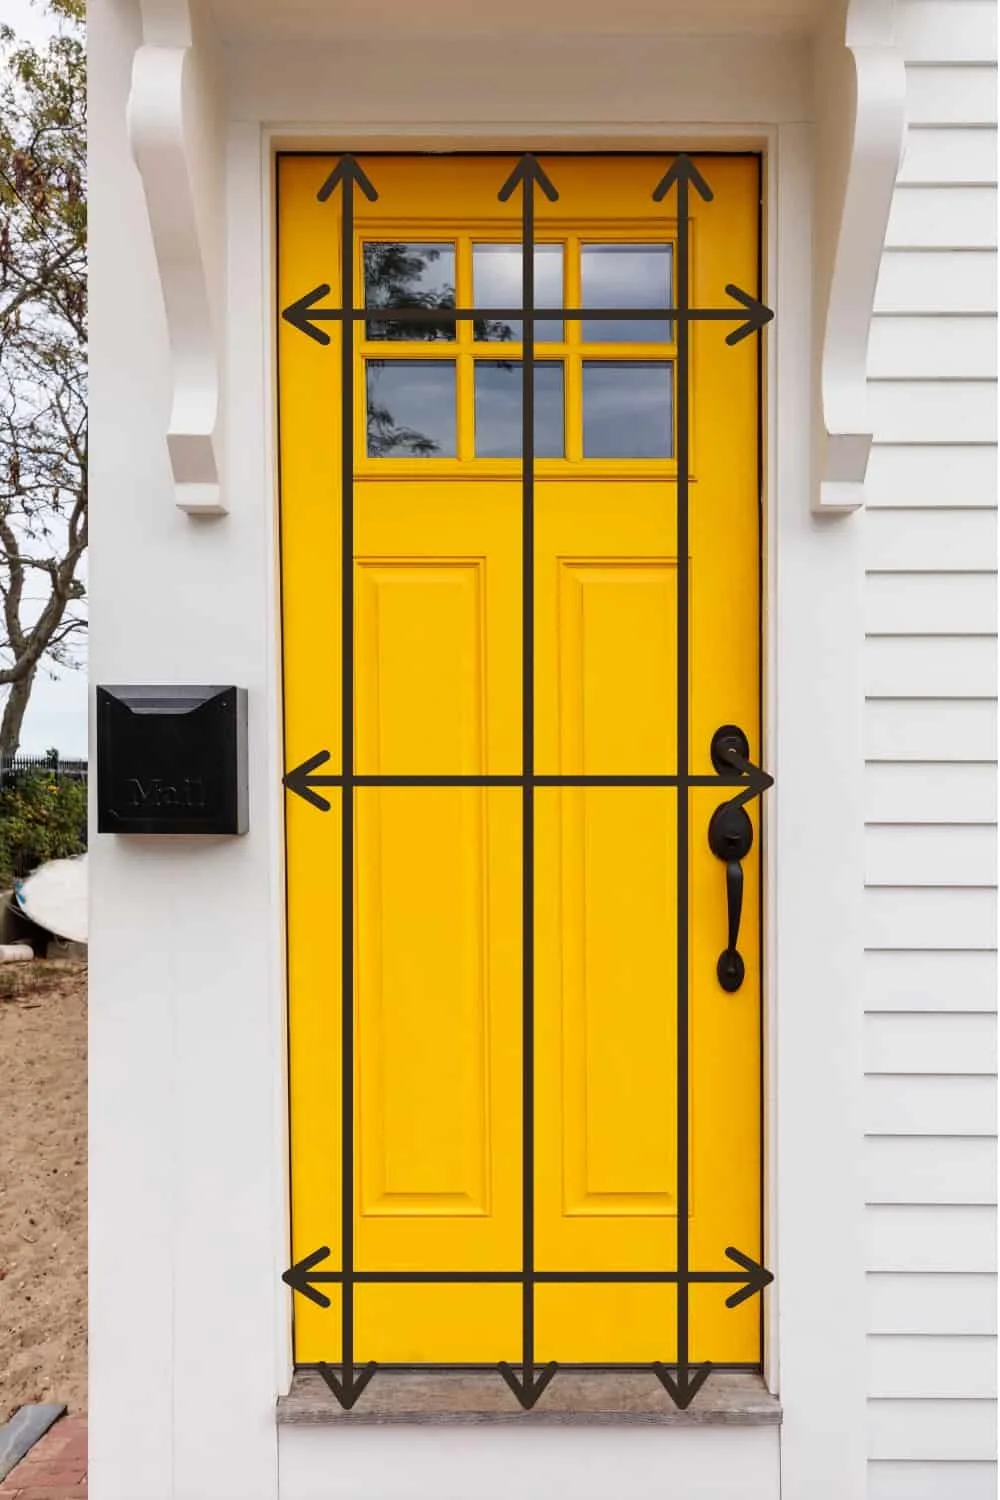
Before you start cutting any wood, it’s crucial to accurately measure your door opening. Here’s how to do it:
- Width: Measure the width of the door opening at three different points: the top, middle, and bottom. Take the narrowest measurement as your final width.
- Height: Measure the height of the door opening on both sides. Again, use the shortest measurement for consistency.
Cutting the Wood Pieces
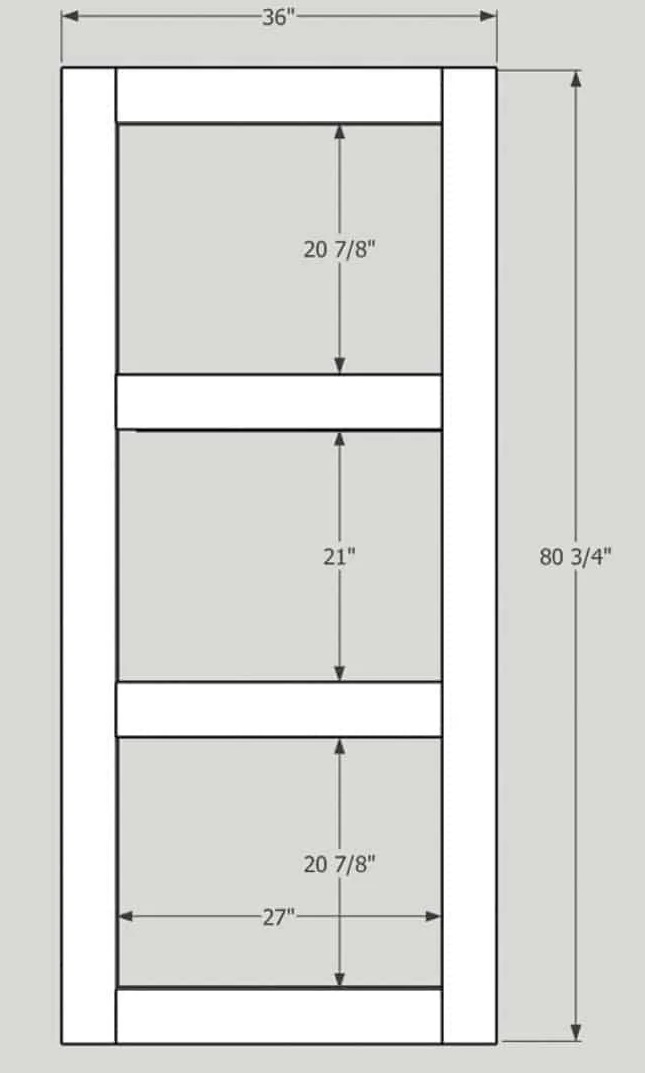
Once you have your measurements, it’s time to use your saw to cut the wood pieces to size. Here’s a breakdown of the typical components for a screen door frame:
- Top rail: Cut one piece of wood to the exact width of your door opening.
- Stiles (vertical side pieces): Cut two pieces of wood to the height you measured for the door opening. Remember to add an inch (2.54 cm) to this measurement for the thickness of the top rail. So, for example, if your door opening is 80 inches (203.2 cm) tall, you would cut the stiles to 81 inches (205.7 cm) tall.
- Bottom rail (optional): While not all screen doors have a bottom rail, it can add rigidity and a more finished look. If you choose to include one, cut a piece of wood to the same width as the top rail.
- Midrails (optional): Depending on the desired design and size of your screen door, you can incorporate one or more horizontal midrails between the top and bottom rails (if present) and the stiles. These rails will add strength and visual interest to the door. Cut the midrails to the same width as the top rail.
Assembly Tips:
- Cutting accuracy: Double-check your measurements before making any cuts. A slight miscalculation can lead to a door that doesn’t fit properly.
- Miter cuts (optional): If you want the corners of your frame to have a professional look, you can make 45-degree miter cuts on the ends of the rails and stiles. A miter saw will make this process much easier and more precise. However, if you don’t have a miter saw or aren’t comfortable with making angled cuts, you can simply create square butt joints.
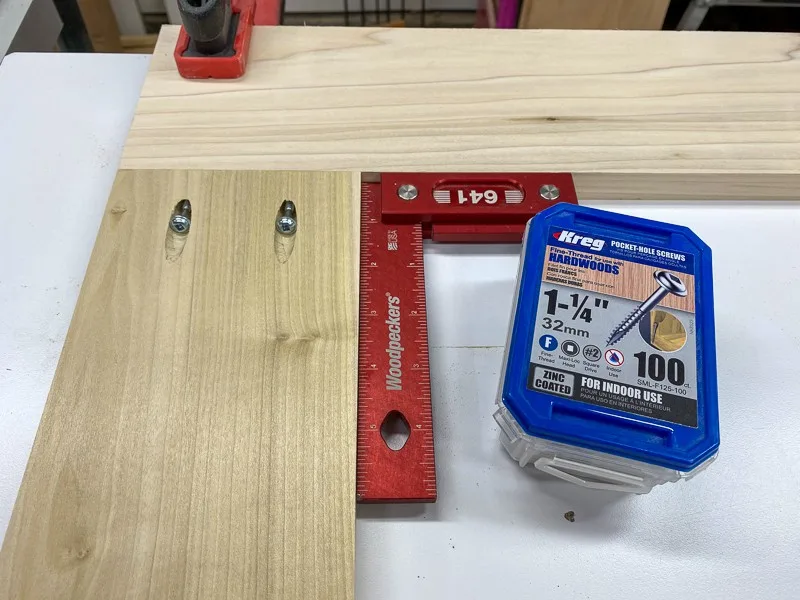
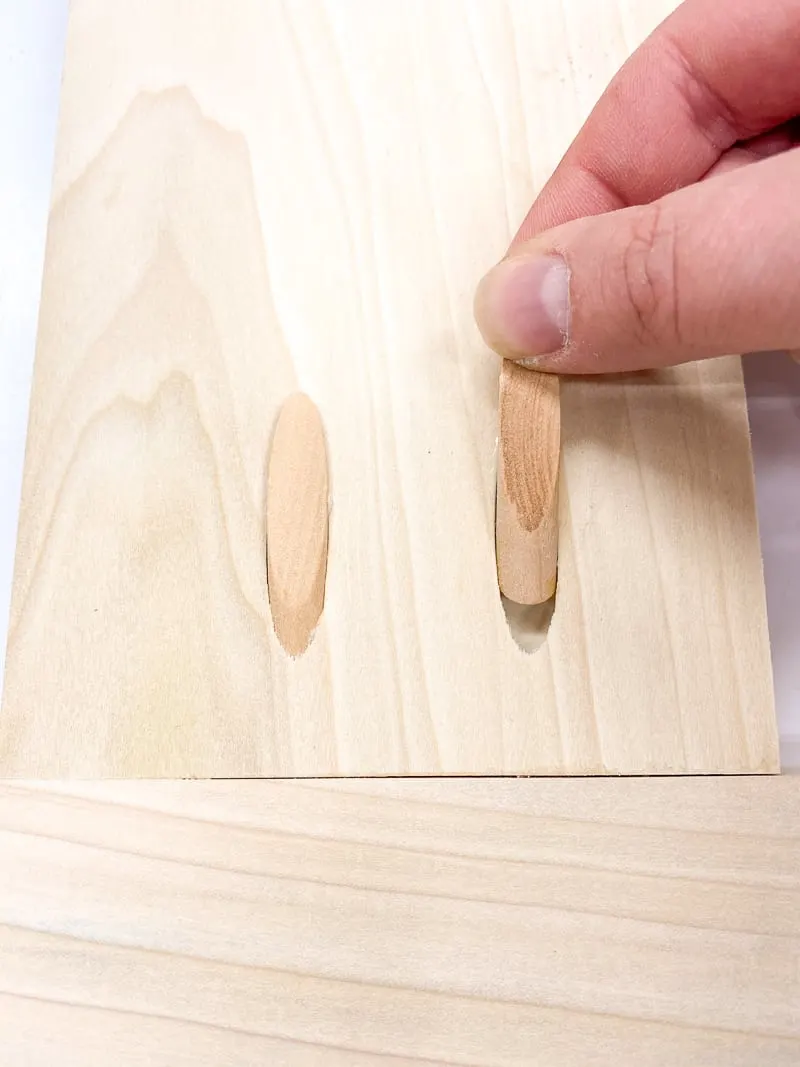
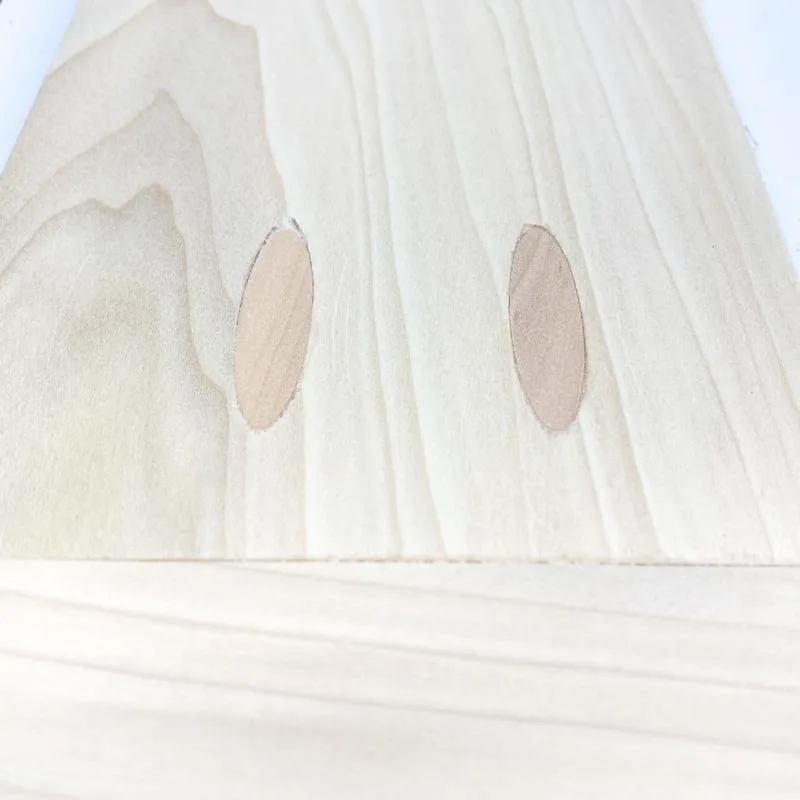
- Pocket hole joinery (optional): If you’re using a pocket hole jig, drill pocket holes according to the jig’s instructions on the ends of the rails and stiles where they will meet. This method creates a strong and clean joint that hides the screws from view.
Assembling the Frame
Once you have all the wood pieces cut to size, it’s time to assemble the frame. Here are the steps involved:
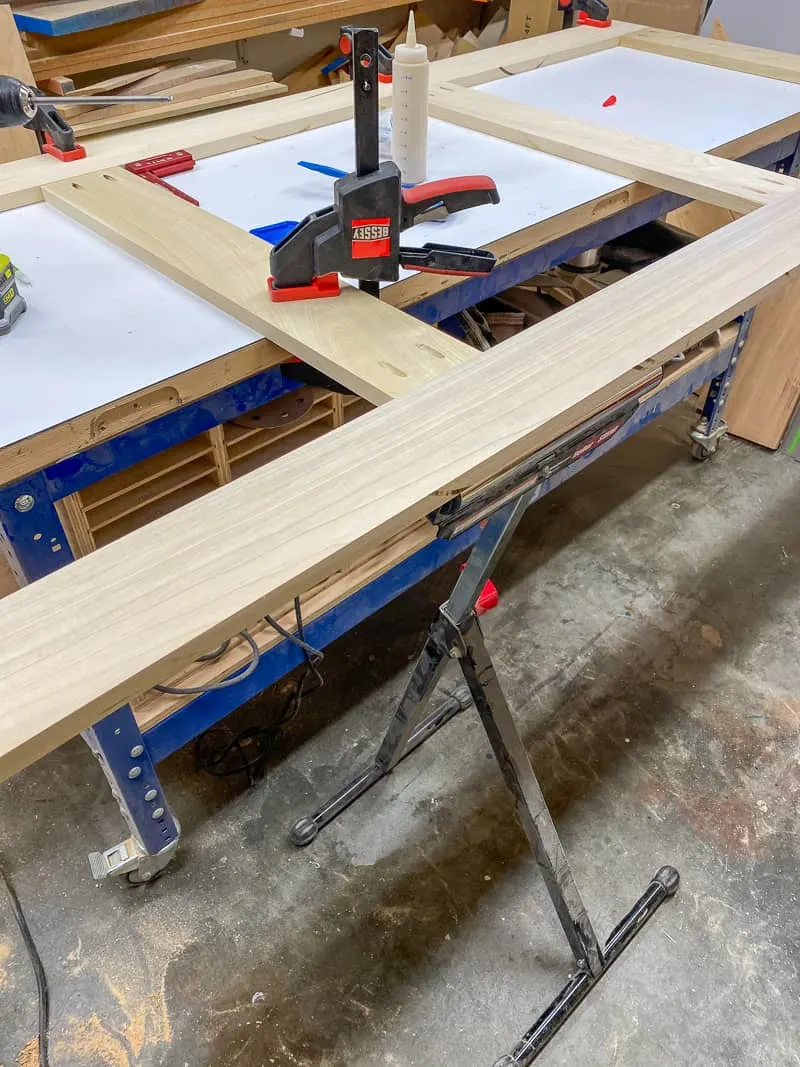
- Dry fitting: Before applying glue, lay the frame pieces flat on a workbench and dry-fit them together to ensure everything aligns correctly. Double-check for squareness by measuring diagonally from corner to corner. Both diagonal measurements should be equal for a square frame.
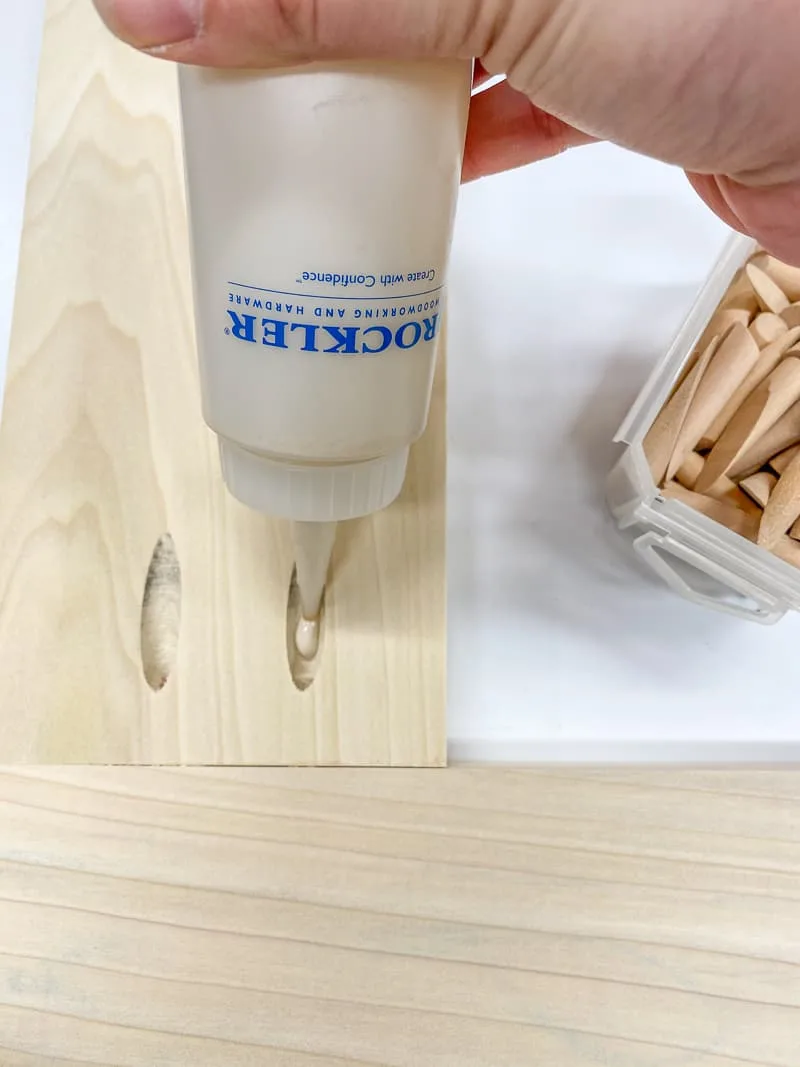
- Applying glue and screws: Apply a generous amount of wood glue to the mating surfaces of the rails and stiles (or into the pocket holes if using that method). Carefully assemble the frame, ensuring all the corners are flush. Clamp the frame tightly together using bar clamps or quick-grip clamps.
- Screwing or driving pocket hole screws: While the glue is drying (refer to the glue’s instructions for drying time), drill pilot holes (if not using pocket holes) and secure the joints with wood screws or pocket hole screws depending on your chosen assembly method.
- Removing clamps and checking for squareness: Once the glue has dried completely, remove the clamps and re-check the frame for squareness. Make any minor adjustments as needed.
Smoothing and Preparing the Frame
Now that the frame is assembled, it’s time to smooth out any rough edges and prepare the surface for painting:
- Sanding: Use various grits of sandpaper (starting with rougher grit and progressing to finer) to sand down any imperfections on the frame surface, including glue residue, rough cuts, and corners. Aim for a smooth and even finish.
- Filling gaps (optional): If there are any small gaps or imperfections in the joints, you can fill them with wood filler. Apply the filler according to the manufacturer’s instructions, let it dry completely, and then sand it smooth.
Painting the Screen Door Frame
Before attaching the screen, you’ll want to paint the frame for weather protection and aesthetics:
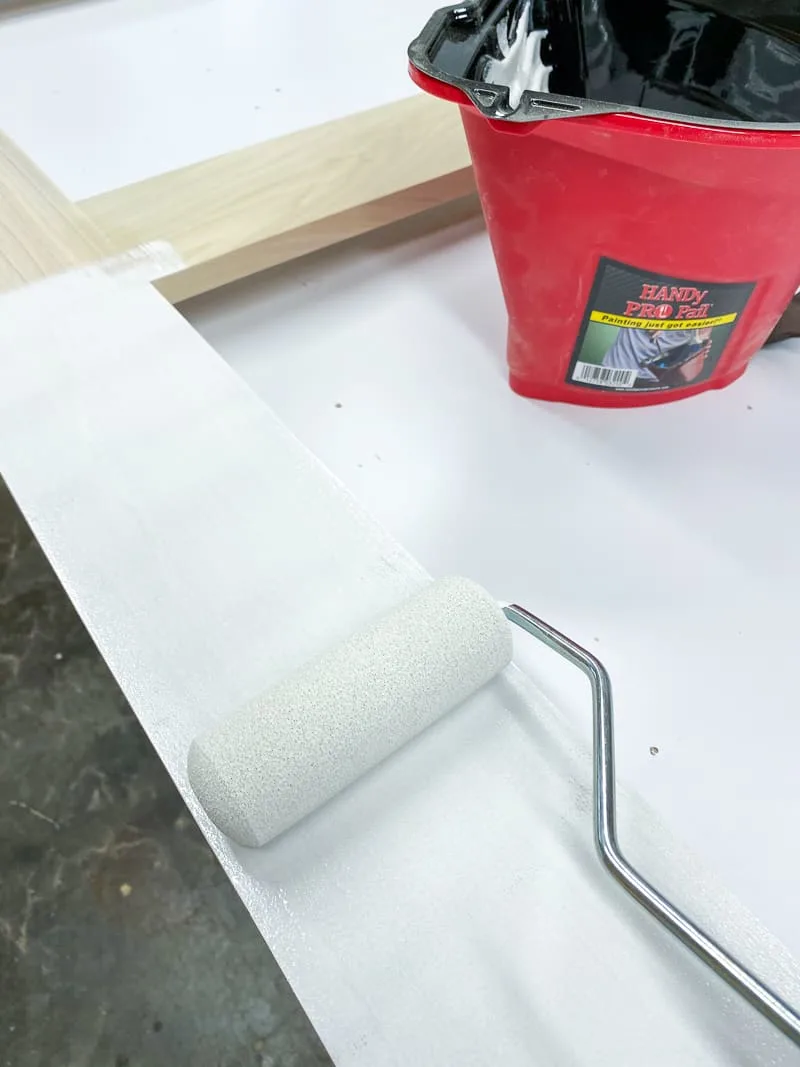
- Applying primer: Apply a coat of exterior-grade primer to the entire frame. Primer helps the paint adhere better and provides an extra layer of protection for the wood. Allow the primer to dry completely before proceeding.
- Painting: Choose a high-quality exterior paint in your desired color and apply two thin coats to the frame. Allow each coat to dry thoroughly before applying the next.
Installing the Screen Mesh

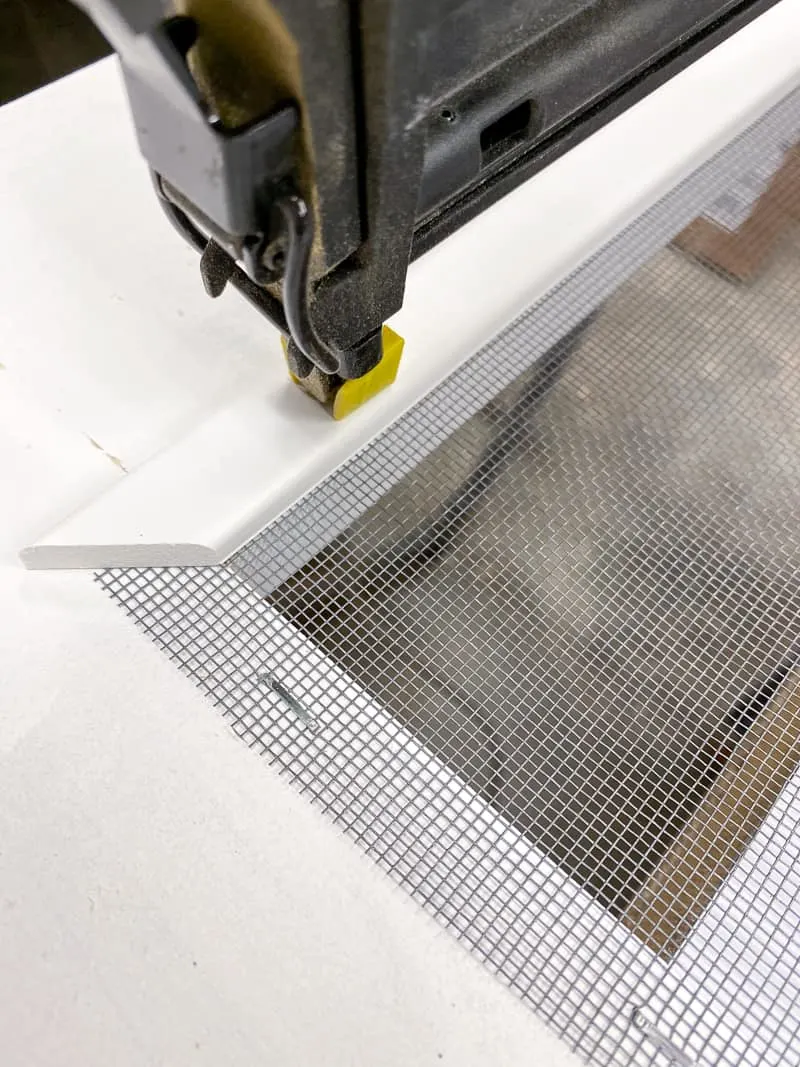
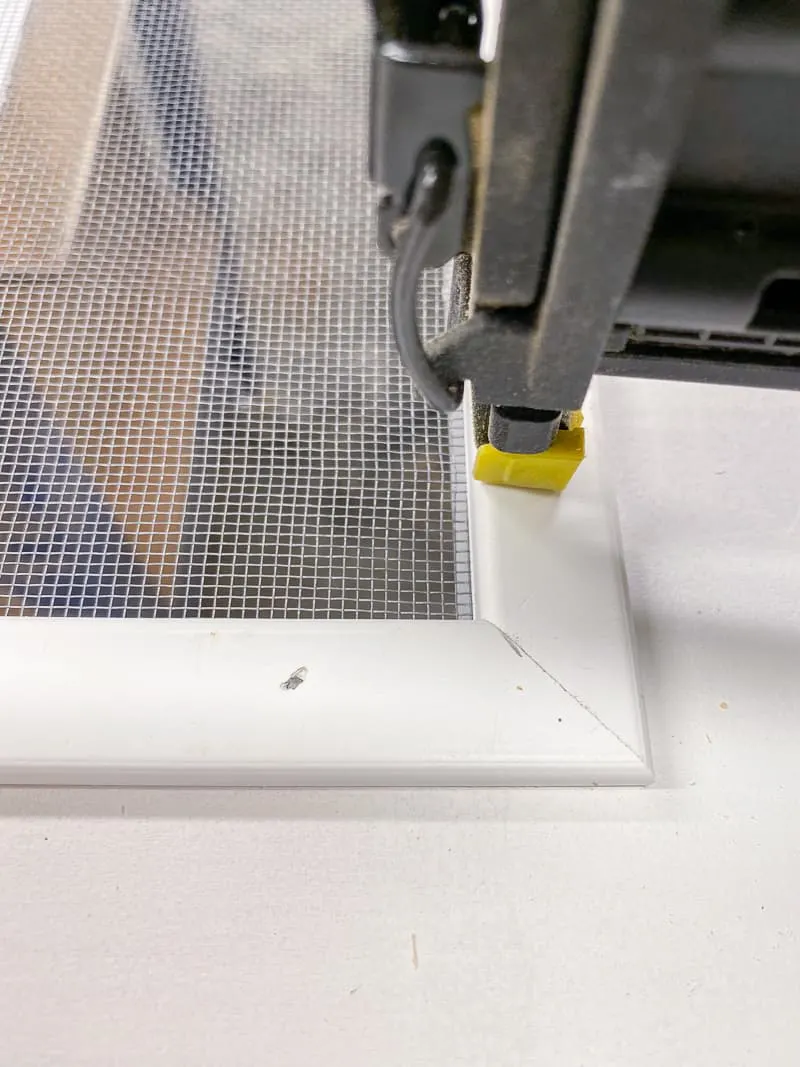
With the painted frame dry, it’s time to install the screen mesh:
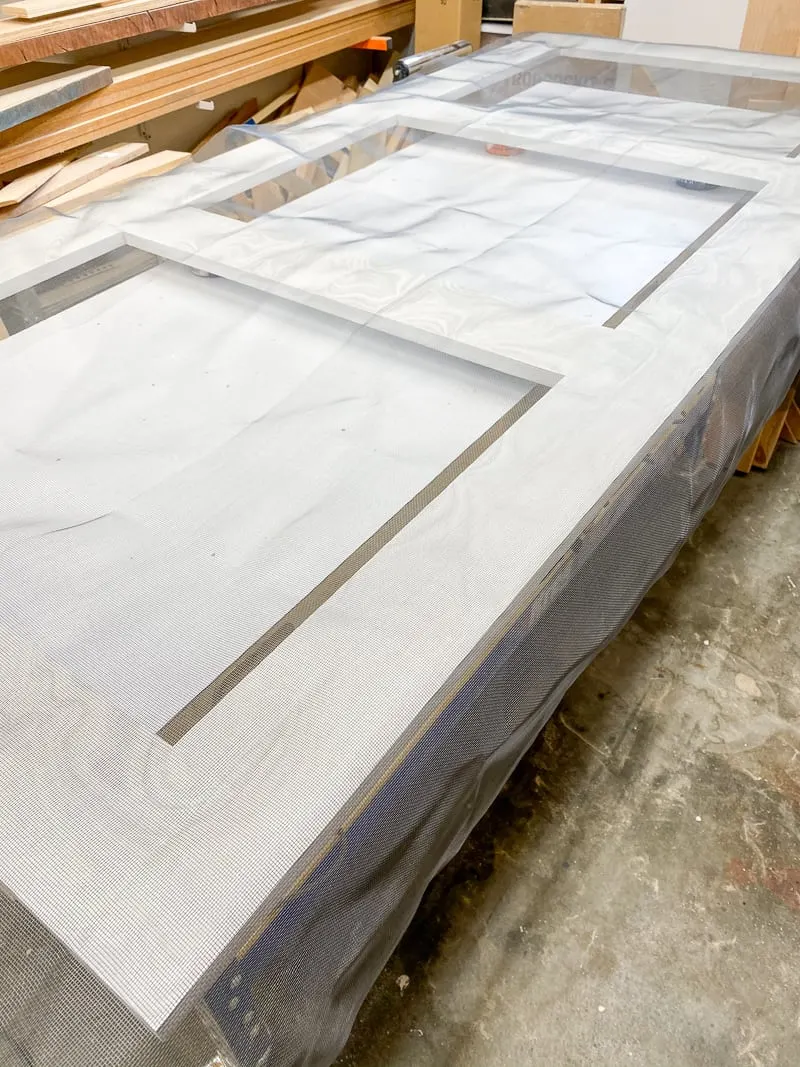
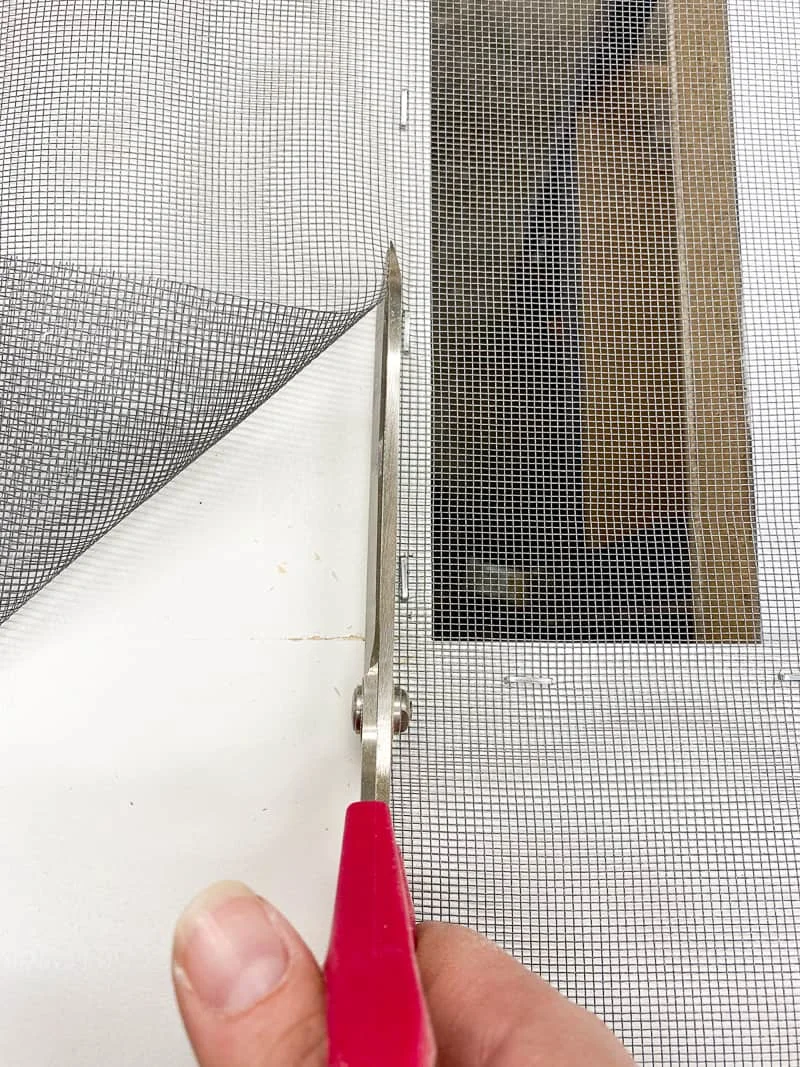
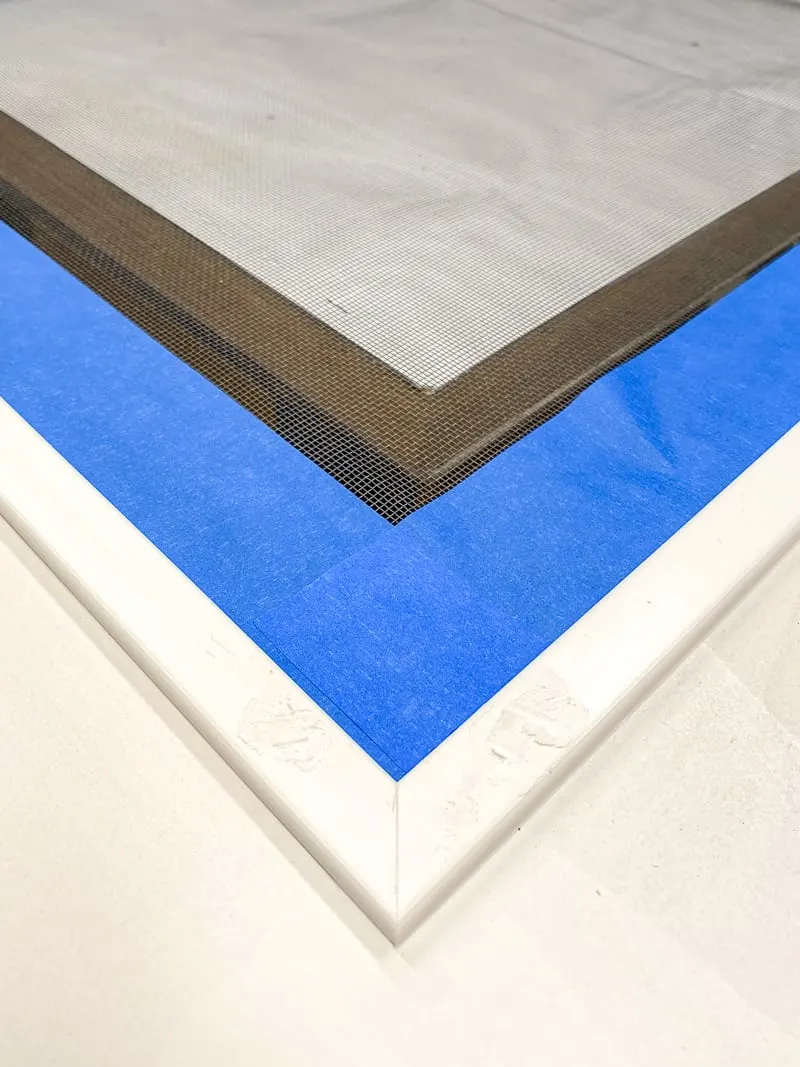
- Cutting the screen: Lay the screen mesh flat on a large workspace and cut a piece slightly larger than the dimensions of your door frame. You can always trim the excess later, but it’s better to have a little extra than not enough.
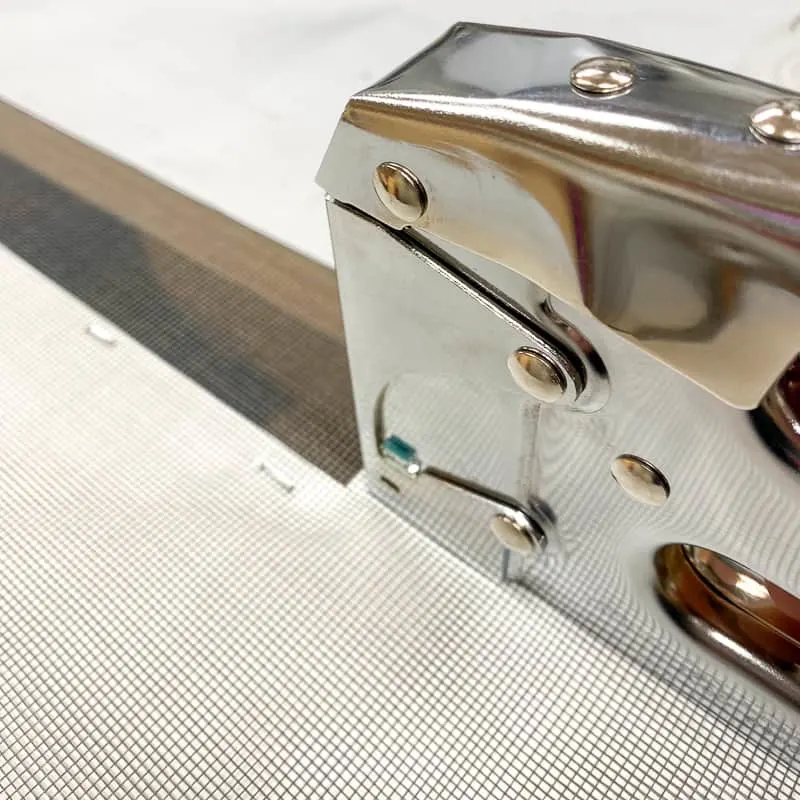
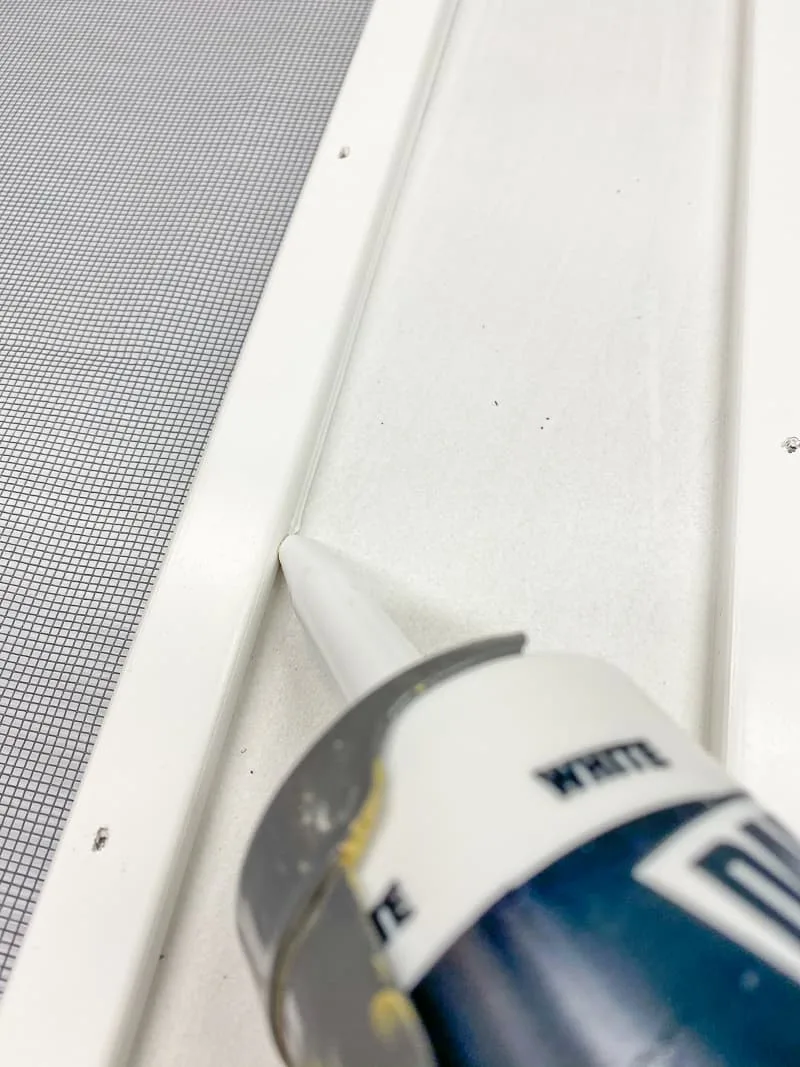
- Attaching the spline: Spline is a thin, flexible material that acts as a wedge to hold the screen mesh in place within the frame groove. There are different types of spline available, but the most common is a rolled vinyl spline. Here’s how to attach the spline:
- Laying the screen: Place the screen mesh over the back of the frame, ensuring it’s taut and wrinkle-free.
- Starting point: Begin at one corner of the frame and push the spline into the groove along one side of the frame using a spline roller tool (recommended) or a blunt object like a screwdriver handle. The spline should fit snugly into the groove.
- Working your way around: Continue pushing the spline into the groove all the way around the frame, working your way from the starting corner. Maintain a moderate tension on the screen mesh as you go to ensure a flat and taut finish.
- Cutting the spline: Once you’ve completed the entire frame, use a sharp utility knife to cut off the excess spline at the starting point, leaving a clean end.
- Trimming the screen: Now that the screen is secured with the spline, use a sharp utility knife or razor blade to carefully trim away any excess mesh around the edges of the frame. Be cautious not to cut into the spline or the frame itself.
Optional: Installing Midrails (if applicable)
If you opted to include one or more midrails in your screen door design, you’ll need to install them before attaching the screen mesh. Here’s how:
- Cutting the midrails: Ensure the midrails are cut to the same width as the top rail and measure their placement on the stiles. Mark the locations with a pencil.
- Drilling pilot holes: Drill pilot holes through the stiles at the marked locations to prevent the wood from splitting when inserting the screws.
- Attaching the midrails: Apply wood glue to the mating surfaces of the midrails and stiles, then secure them together with screws. You can use pocket hole joinery for a cleaner look if you used that method for the frame assembly.
- Checking for alignment: Once the glue dries, ensure the midrails are aligned and level before proceeding with installing the screen mesh.
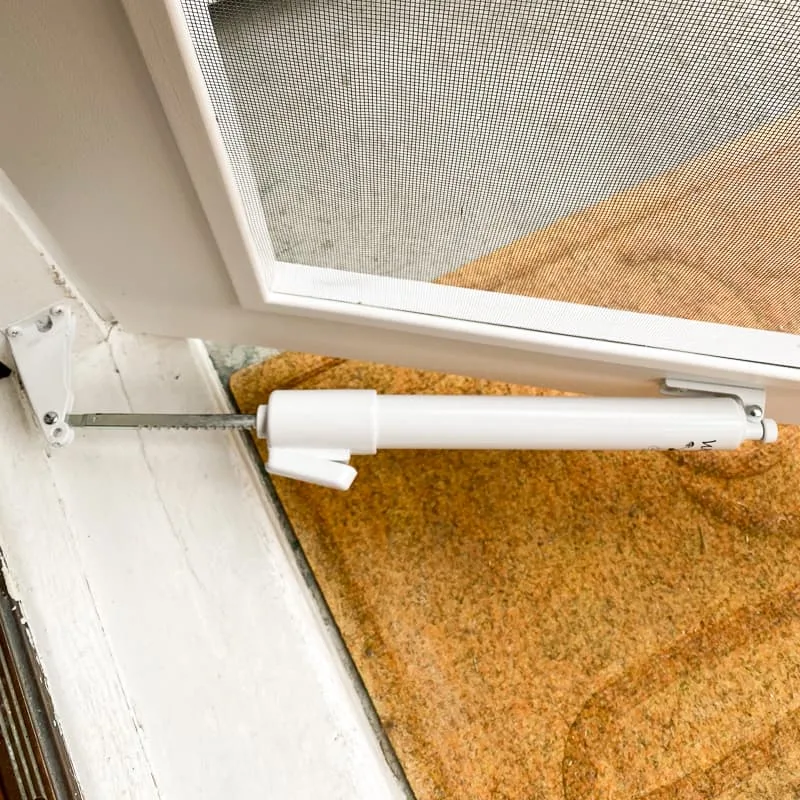
Attaching the Door Hinges
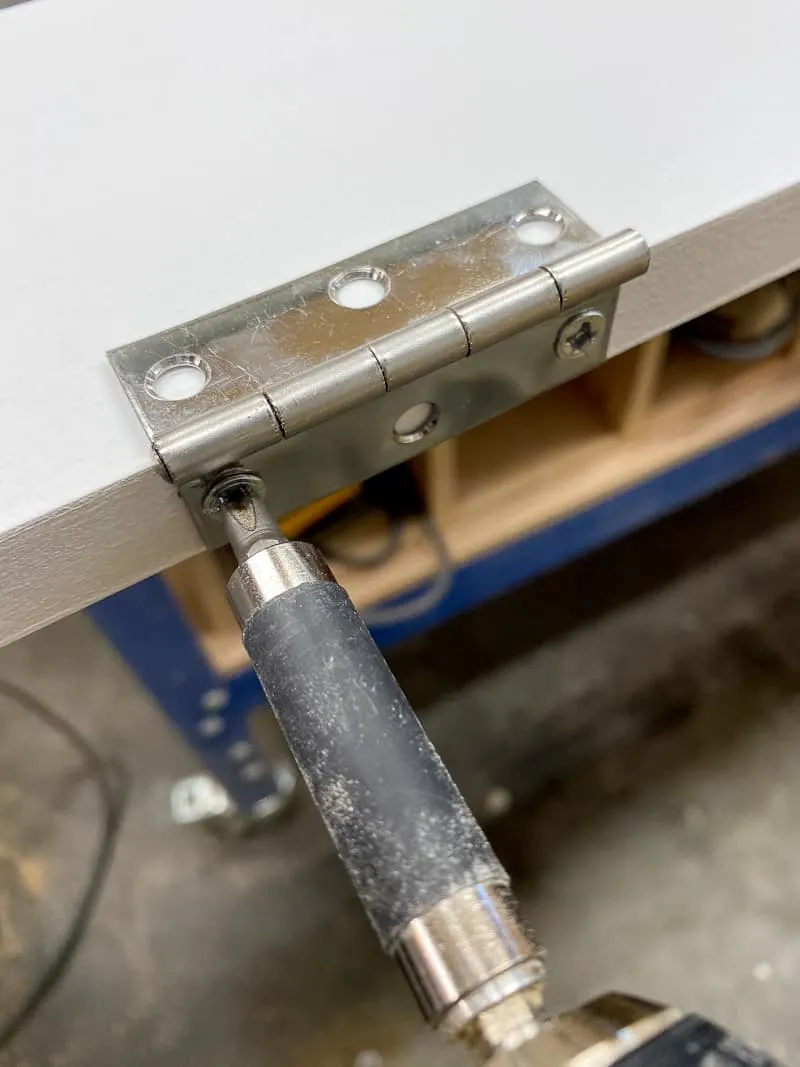
Now that you have a complete screen door frame with screen mesh securely attached, it’s time to install the hinges that will allow you to hang the door on your door jamb.
- Hinge selection: Choose two exterior-grade door hinges with a weight capacity suitable for your screen door.
- Positioning the hinges: There are two main hinge placement options:
- In-swing door: If your screen door will swing inwards towards your home, position one hinge at the top of the door frame and the other at the bottom, with a spacing of about 6 inches (15.2 cm) from the top and bottom edges of the frame.
- Out-swing door: If your screen door will swing outwards away from your home, position the hinges on the opposite side of the frame (exterior side) with the same spacing.
- Marking the screw holes: Hold the hinge in place on the frame at the chosen location and mark the screw hole locations with a pencil.
- Drilling pilot holes: Drill pilot holes at the marked locations to prevent the wood from splitting when inserting the screws.
- Attaching the hinges: Secure the hinges to the frame using the screws provided with the hinges.
Hanging the Screen Door
With the hinges attached to the screen door frame, you can now hang the door on your door jamb. Here’s what you’ll need to do:
- Positioning the door: Carefully lift the screen door and position it within the door jamb, aligning the hinges with the corresponding hinge locations on the jamb.
- Attaching the top hinge: With a helper if possible, hold the door in place and secure the top hinge to the door jamb using the screws provided.
- Checking alignment: Ensure the door is level and swings freely without catching on the jamb. You may need to make slight adjustments to the hinge placement or door position.
- Attaching the bottom hinge: Once you’re satisfied with the alignment, secure the bottom hinge to the door jamb using the screws.
Installing a Door Handle (Optional)
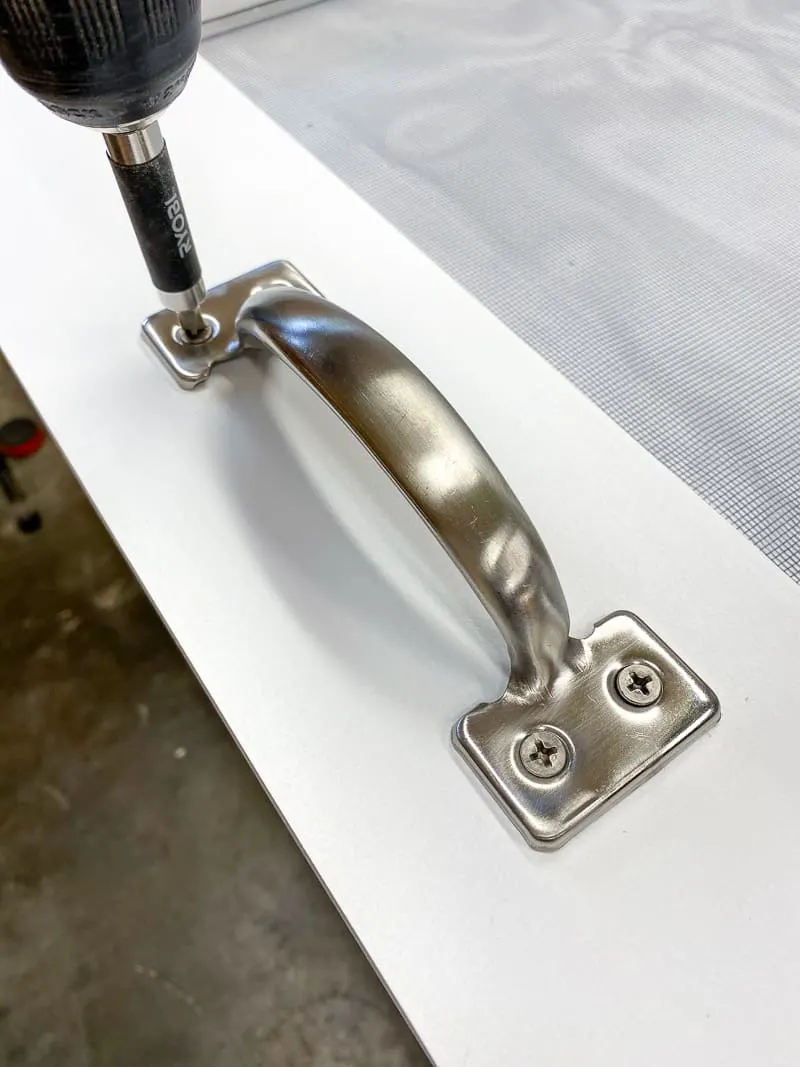
While not essential for functionality, a door handle adds a touch of convenience and style to your screen door. Here’s how to install one:
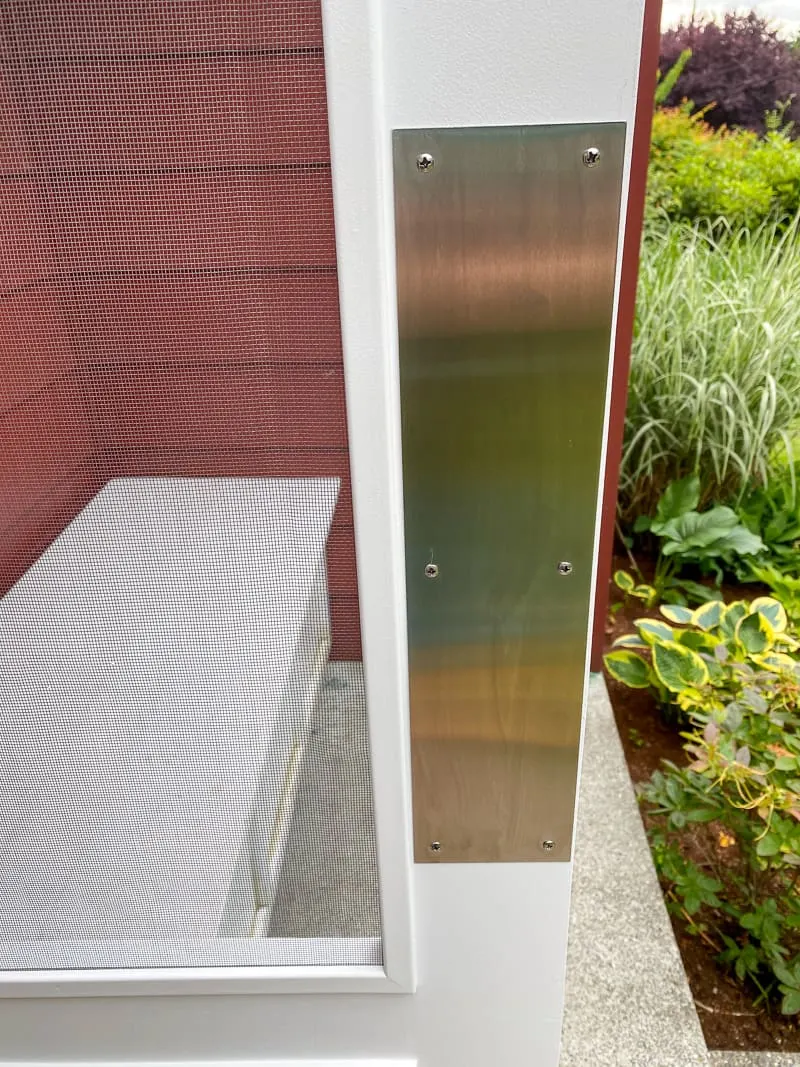
- Choosing a handle: Select a handle or knob that complements the design of your screen door and is suitable for exterior use. Opt for materials like stainless steel, wrought iron, or weather-resistant plastic.
- Marking the screw holes: The handle will typically come with a template or instructions for marking the screw hole locations on the door. Follow the manufacturer’s instructions to mark the drilling spots accurately.
- Drilling pilot holes: Drill pilot holes at the marked locations to prevent the wood from splitting when inserting the screws that will secure the handle.
- Attaching the handle: Align the handle with the screw holes on the door and secure it using the provided screws or fasteners. Tighten the screws firmly but not excessively to avoid damaging the handle or the door.
Completing the Project
Congratulations! You’ve successfully built and installed your very own screen door. Here are some final touches to consider:
- Weatherstripping (optional): For added weather protection and a tighter seal, you can apply weatherstripping to the interior edges of the door frame. This will help minimize drafts and insect infiltration.
- Touch-up paint (optional): If there are any minor scratches or blemishes on the painted surface, use a small brush and touch-up paint to address them for a clean and finished look.
- Enjoying your new screen door: Now you can step back and appreciate the fruits of your labor! Your new screen door will provide fresh air ventilation, keep pesky insects at bay, and add a touch of charm to your home.
This guide has hopefully empowered you to build your own screen door. Remember, the key is to take your time, ensure accurate measurements and cuts, and don’t hesitate to consult additional resources online or at your local hardware store if needed. Happy building!