
Kitchen sink replacement is a DIY project that makes a big impact. Kitchen sinks get worn out over time due to daily use. A new sink renews the beauty of your kitchen and adds functionality to your space. Using a few tools, the right equipment and a little know-how, you’ll be enjoying a new kitchen sink in no time. Follow this quick guide to learn how to tackle this exciting home project.
Measure and Plan
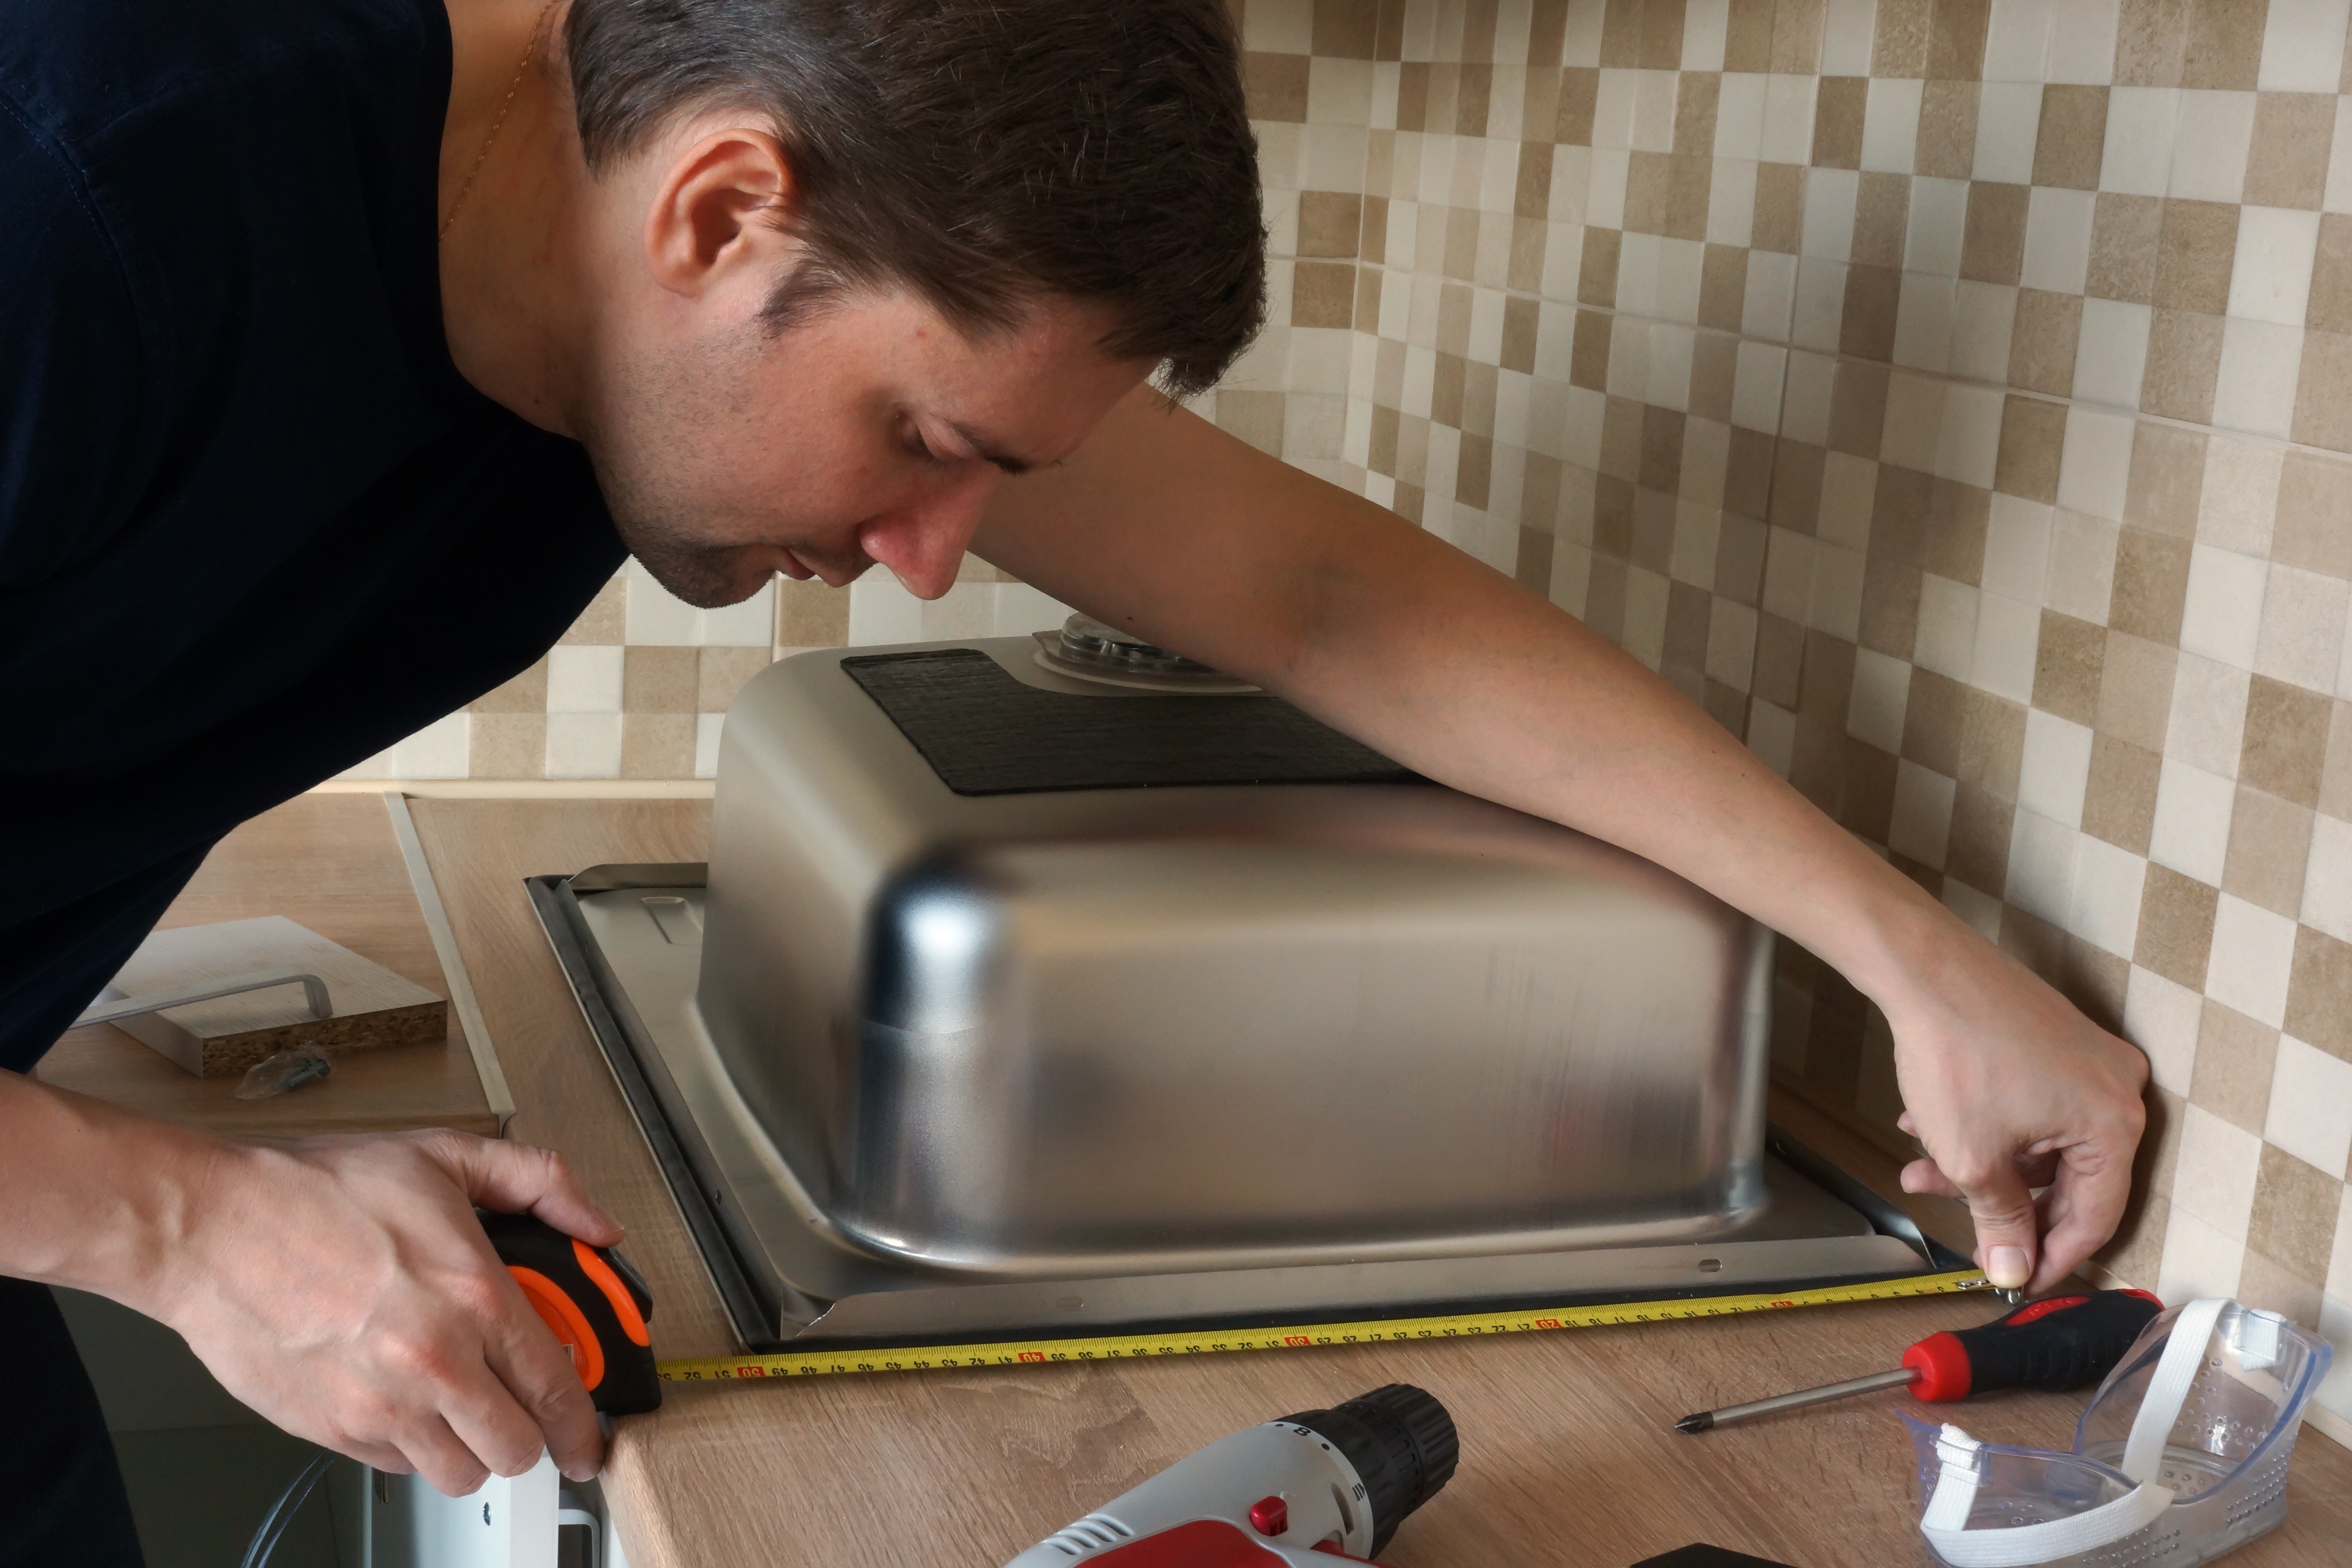
Before starting the replacement project, take some basic measurements and assessments. This will help you grab the right tools and choose the right sink. First, measure your current sink’s width, depth and length. Notate whether it is a drop-in sink or an undermount sink. A drop-in sink has a lip that sits above the countertop. An undermount sink attaches below the countertop with clips. Once you know your current sink’s size and mounting style, use this information to pick a new kitchen sink.
Tip: Sometimes it’s possible to replace one sink style with the other. Take note of the material of your countertops. Solid surface countertops, such as marble or granite, offer the supportive structure needed for undermount sinks. If you don’t have a solid surface countertop choose a drop-in sink.
Prep the Area

A kitchen sink replacement starts by removing your existing one. Before you uninstall your current sink, follow these steps:
- Turn off the water supply: Reach under the sink and find the knob that turns off the water supply. After turning the knob, test the faucet to ensure the water supply is properly shut off.
- Remove the drain trap: Place an empty bucket beneath the drain trap under the sink. The bucket catches any standing water in the drain trap. Twist the slip nuts to the left to loosen them. Remove the drain trap.
- Remove the water supply tubes: The underside panel of your sink has coupling nuts that secure the water supply tubes to the faucet tailpiece. Loosen the coupling nuts with a plumbing wrench to separate the water supply tubes from the existing sink. Keep the bucket in place to catch any spills.
- Disconnect additional fixtures and clips: Some sinks feature extra plumbing fixtures, such as hang sprayers or disposals. Disconnect those futures from the sink.
Remove the Old Sink

Now that the connections are detached and the water supply is off, it’s time to remove your old sink.
- Remove clips: If your sink has clips securing it into place from below, remove them. This typically only applies to undermount sinks.
- Slice caulking: Use a utility knife or straight edge to slice through the caulking around the sink where it meets the countertop
- Lift the sink: With the caulking detached, lift the sink up and out of place. If the sink doesn’t lift easily, it may still be attached to something. Check that all fixtures are uncoupled. Then verify the caulk has been fully sliced through.
- Remove residual caulk: With the sink removed, use a putty knife to scrape away any leftover grime and caulk
- Clean the countertops: Use a multipurpose cleaner to thoroughly clean the countertops to prepare for the installation of the new sink
Install the Fixtures

Before installing the sink, attach the faucet, straining basket and disposal. Place the new sink on a countertop or a pair of sawhorses. Install the sink features using the included manufacturer’s instructions.
If your kitchen sink drain parts don’t come with instructions, use a ring of plumber’s putty underneath the lip to lower the basket into place. On the underside of the sink, slip a gasket around the threaded part of the drain basket. Next, place a washer and a lock nut, screwing the lock nut into place. Finally, remove any putty that oozed under the basket rim with a dry rag.
Apply Silicone Caulk
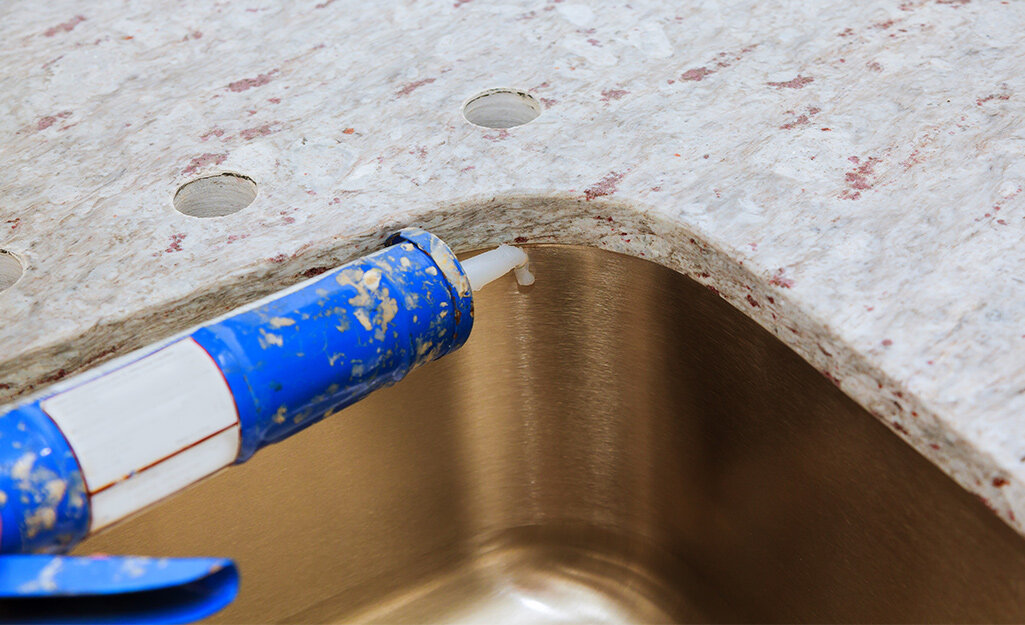
Apply silicone caulk to seal your new sink to the countertop. The method varies slightly depending on how your sink mounts to the countertop.
- Drop-in sink: Apply a line of silicone caulk around the countertop opening. Trace the sink opening of the countertop with a continuous line of caulk. It will follow the same path as the old layer of caulk you scraped away when removing your old sink.
- Undermount sink: Apply a line of silicone caulk to the sink. There’s a lip around the top of the undermount sink to follow.
Tip: Keep the flow of caulk even for a flush, water-tight seal. If you haven’t used caulk before, try a few practice runs on some scrap cardboard.
Install New Sink

Now it’s time to install the sink. The installation method varies depending on the mounting style of your sink:
- Drop-in sink: Drop the new sink into the opening. Press down firmly along all the edges. If any excess caulk oozes around the edges of the sink, wipe it away before it hardens.
- Undermount: Open the lower cabinets and work the sink up into place. Grab a friend to help support the sink from above. Secure the clips to the sink and countertop. Work around the perimeter of the sink using the pilot holes from your old sink.
Reconnect Drain and Supply Lines

Once the sink is positioned and secure, reconnect the supply lines. Go under the sink and reconnect any water supply lines. Connect the supply to the hand sprayer and drain trap as well. If your sink has a garbage disposal, follow the manufacturer’s instructions for proper connection. This process works similarly, regardless of the mounting style of your new sink.
Turn the Water Back On

When you have everything reconnected, turn the water supply back on and test the sink. Look under the sink for leaks or drips and adjust the connection as needed. Check every function of your sink to verify the connections are secure, and you have full use of all available features. If you notice any leaks, changes in water pressure, or drips, turn the water supply off and recheck the connections.
If you want to watch this step-by-step process for yourself, check out our instructional video, which will show you how to replace drop-in sink styles in your kitchen. If you’re worried about replacing a kitchen sink on your own, our trusted professionals offer installation services. They’ll come to your house, replace the kitchen sink and add any new faucets or fixtures you’ve chosen.
Tip: Learning how to replace a kitchen sink is only the beginning, you can use this same process to replace bathroom sinks as well.