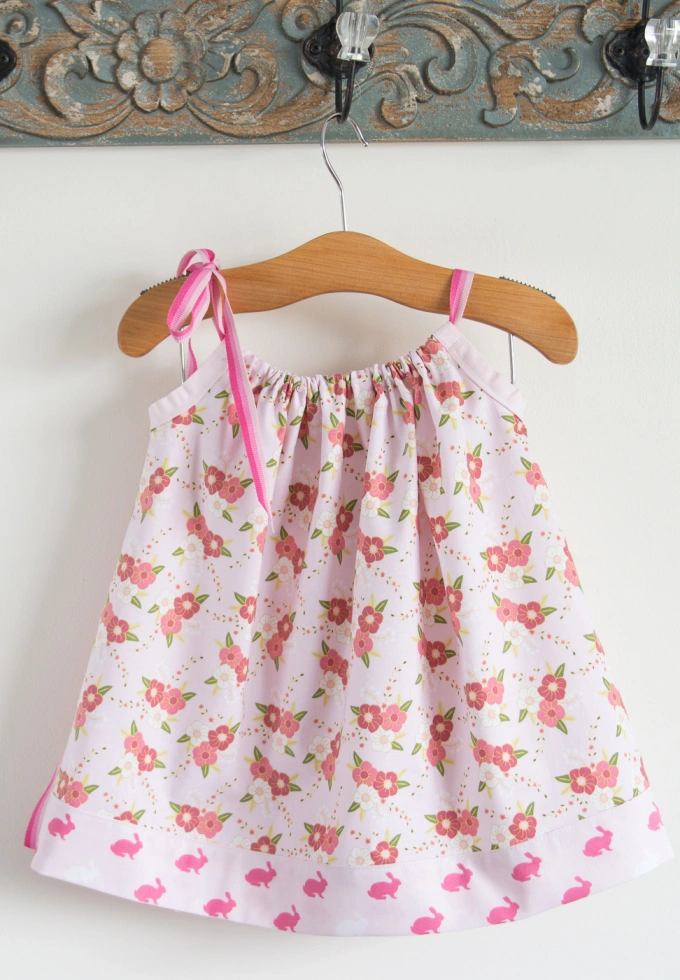
Hello!! My name is Melissa Mortenson I’m a fabric designer. My kids are now all teenagers, so long gone are the days of me sewing them adorable little dresses for Easter. Let me tell you I absolutely adored sewing Easter dresses. I’d spend months dreaming up the design and enjoyed every minute of the construction process from fabric selection to finishing touches.
When my girls were younger I used to love making them pillowcase dresses, I sat down and counted and I think I’ve made at least 20. They are very quick to sew and you can easily change them to any size you want!
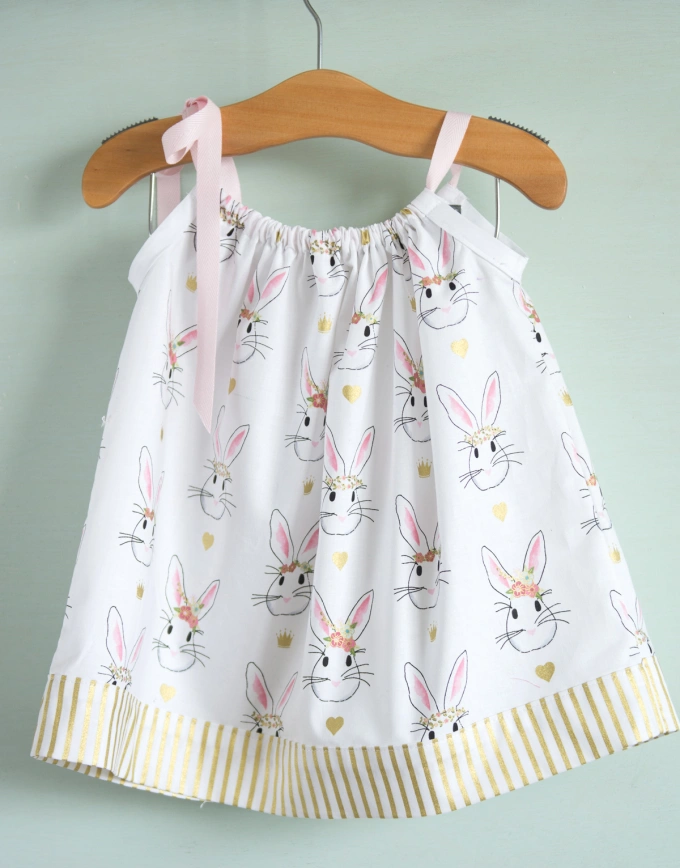
I was chatting with a friend the other day who said she wanted to make some dresses for her girls but had never sewn any children’s clothing before and wasn’t sure where to start. I immediately thought of those simple little pillowcase dresses that I used to sew. Since I know that many of you may also be new to the sewing world, I thought you might like a tutorial for a simple dress that you can sew yourself! If you’re a more experienced seamstress, you’ll love how quick these little dresses are to make.
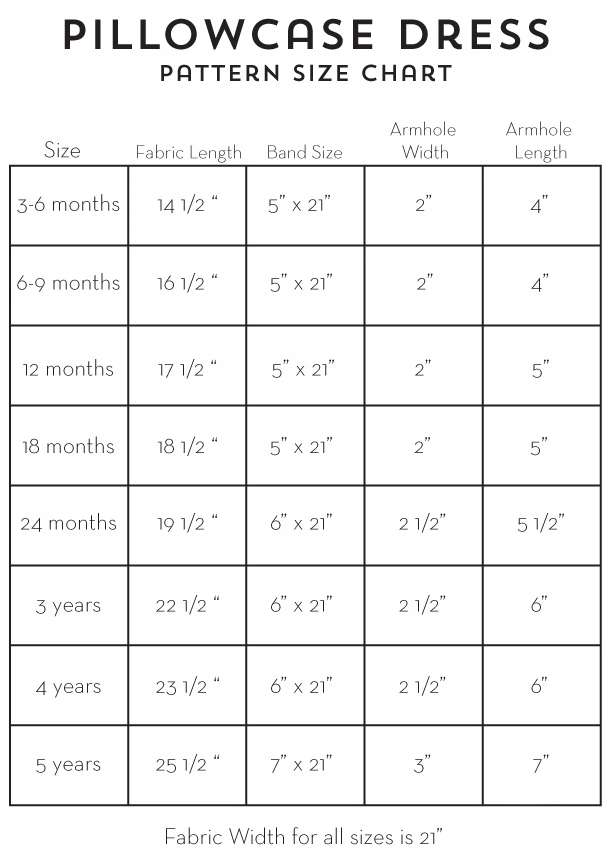
The dresses I made are sized 3-6 months. You can easily resize the dresses as you like, and I’ve included some measurements for you to go by. Keep in mind though, that each child is unique so it’s always best to double check the dress dimensions before you start to sew.
Materials to sew a pillowcase dress
- 1/2 – 1 yard of fabric for dress depending on the size
- 1/4 yard fabric for dress band
- 2 yards of 1/2″ wide ribbon
- 1 package of double fold bias tape (I used extra wide since it is what I had on hand, you can use narrower bias if you want).
Helpful sewing accessories
- Dual Feed or Walking foot for sewing machine, I sew on a BERNINA 770 QE
- Safety Pin to feed ribbon through casing
- Fray check for ends of ribbon
- Small Sewing Scissors
- Seam Gauge
All seam allowances are 1/2″ unless otherwise noted.
Step one
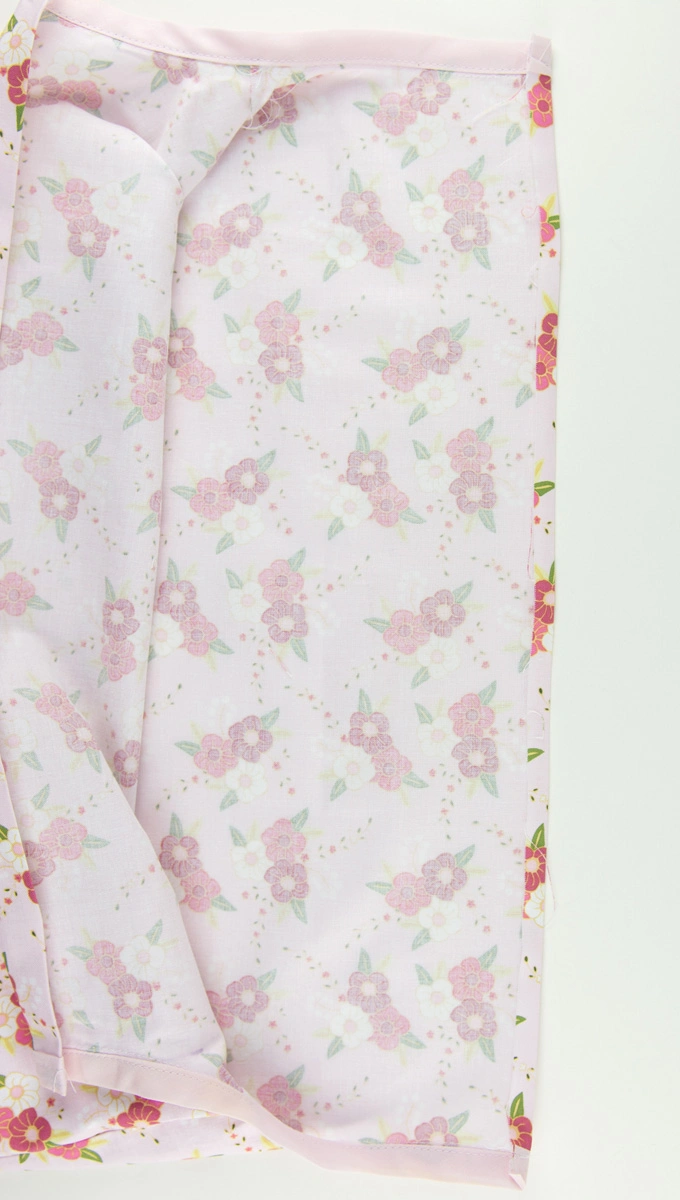
Cut out your pieces using the size chart above. The length is the length of the dress from shoulder down plus the 2-3″ band at the bottom of the dress. If you’re not sure what size to make, measure your “model” and go by the length you want the dress to be.
Most fabric is 44″ wide, that is why all of the pieces are 21″ wide, this will allow you to cut 2 pieces of fabric at the same time with minimal waste. Since the dress is gathered up in the front the smaller sizes will be more gathered and the larger sizes less. You can make the dress wider if you like, but you’ll need more fabric.
Begin by cutting two pieces of fabric 21″ by the desired length using the chart above. These are your dress front and back pieces. Cut two pieces of fabric for the band at the bottom also using the chart above as a guide.
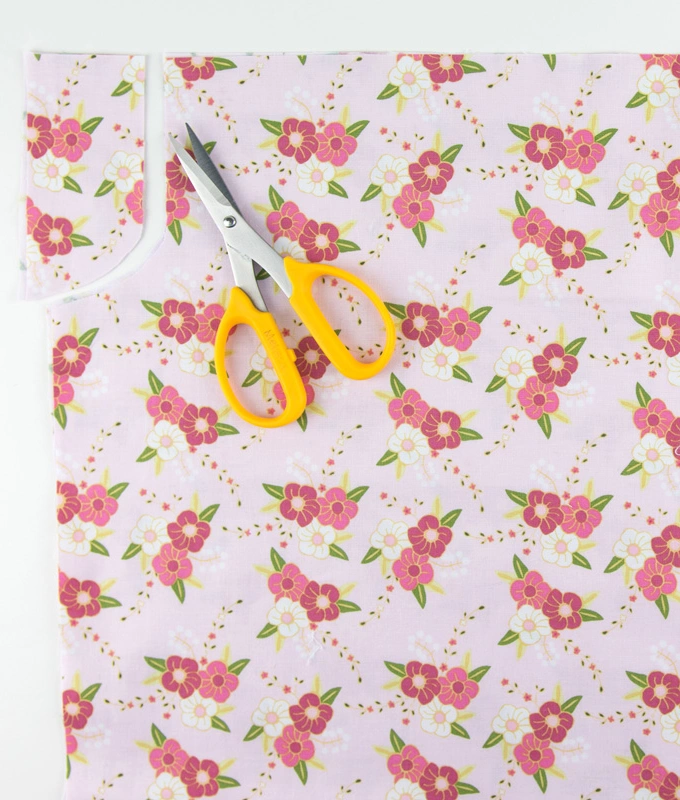
Next you need to cut your armholes. Since I made a size 3-6 months I measured in 2″ from the sides of my dress front and back pieces (along the 21″ side) and 4″ down (again refer to the chart). I then drew a line and rounded the corner with a CD (you want to cut out a J shaped hole) I cut out the arm hole then folded the pieces in half and cut the same hole out of the opposite side of the fabric.
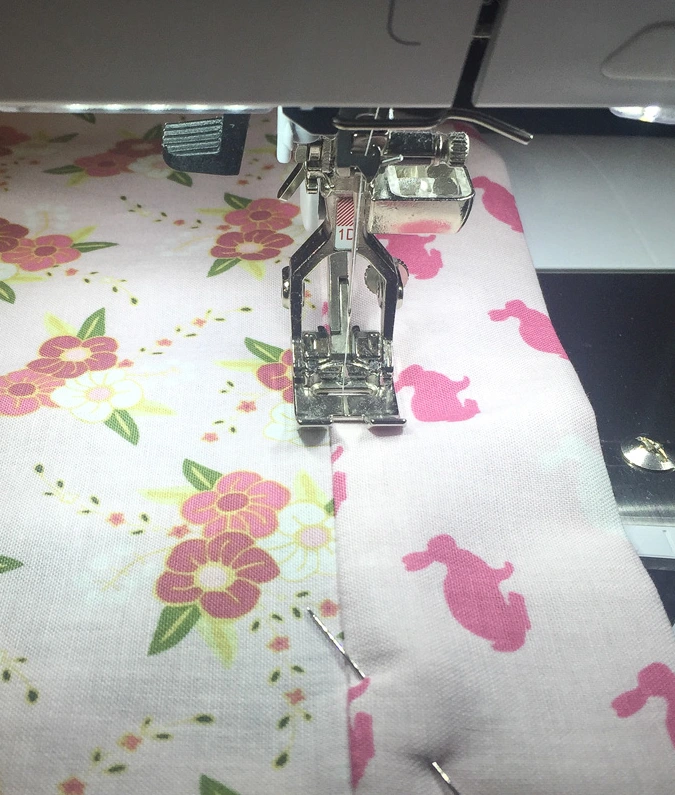
Next, sew the dress band to the dress front and back pieces, right sides facing. Press the seam towards the band.
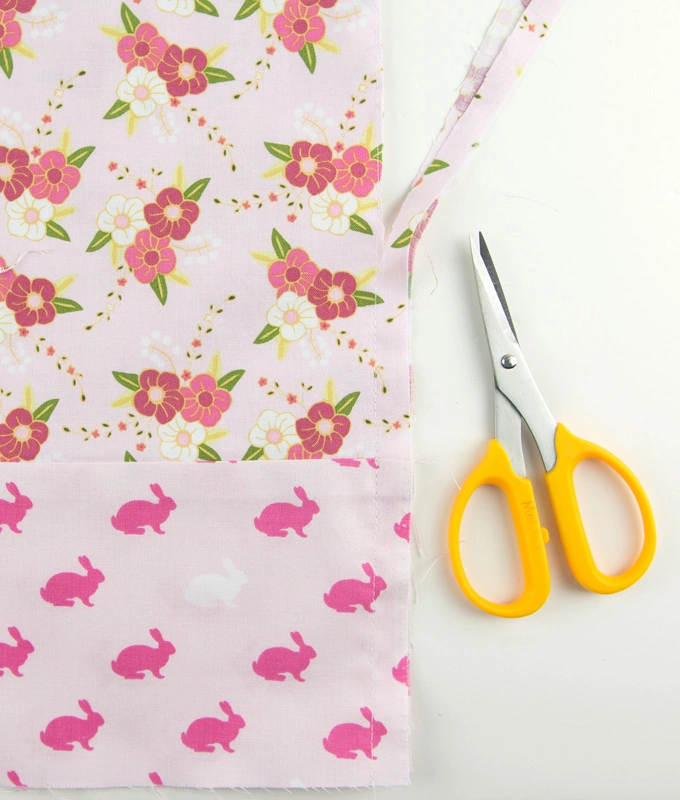
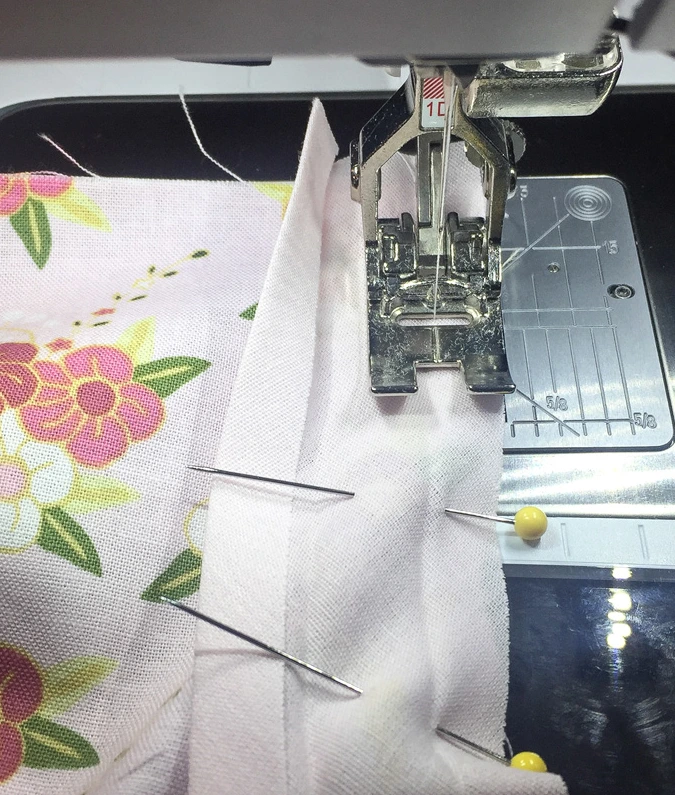
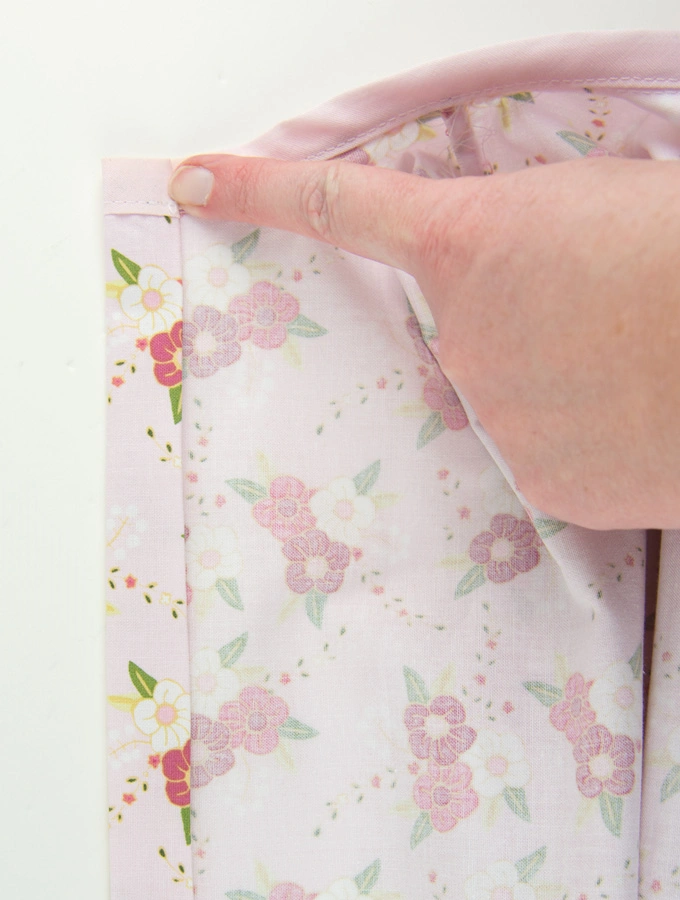
Sew the dress front and back pieces together using a french seam. To do this sew the dress front and back pieces together wrong sides facing.
You will then use your scissors to trim the seam allowance down to a scant 1/8″. You want to cut as close to the seam as you can without actually cutting the seam.
Press seam.
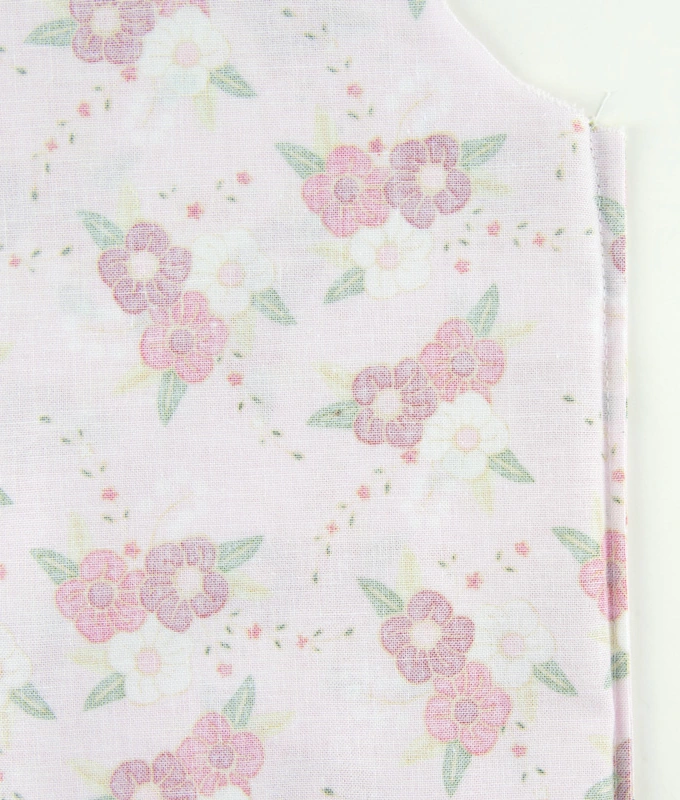
Turn the dress wrong side out and stitch down the side seam with a 1/4″ seam allowance. This will catch the raw edge of the seam and leave you with a nice finish on the inside of the dress.
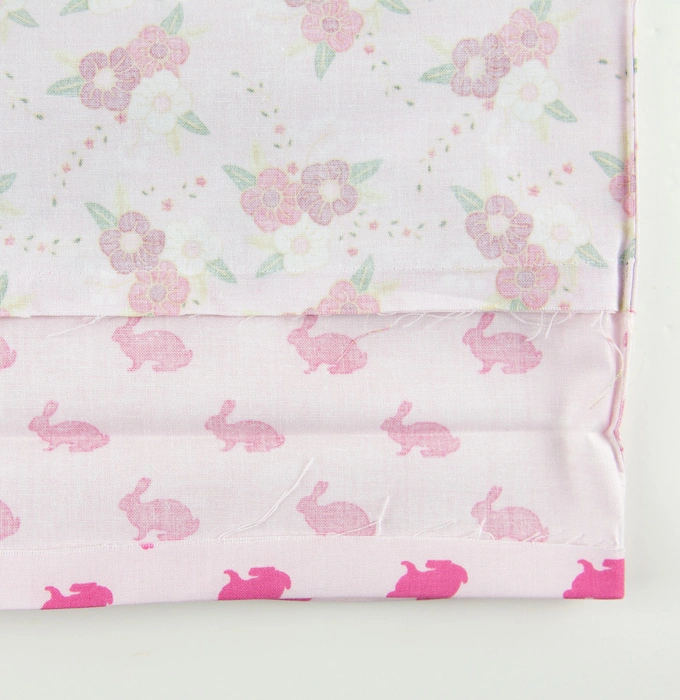
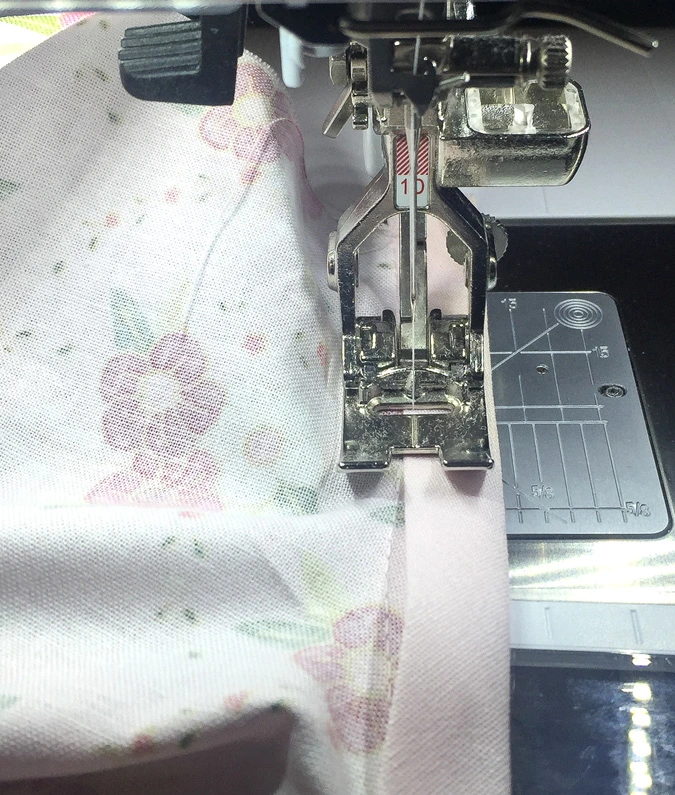
Press the raw edge of the dress band 1/2″ towards the wrong side of the fabric.
Fold so that the folded edge is even with the seam between the dress and the dress band.
Pin in place.
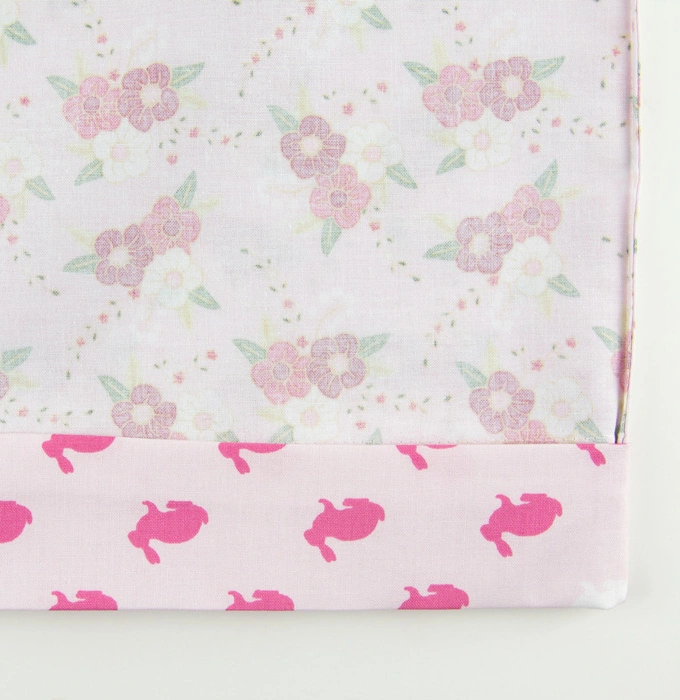
Stitch band in place on the right side of the dress just inside the seam between the dress and dress band. Engage your Dual Feed foot to help the fabric feed evenly as you stitch.
Press.
Next you will finish off the arm holes. Take your double fold bias tape and unfold it. Pin the bias tape to the arm hole so the raw edge of the bias tape is even with the raw edge of the arm hole.
Stitch in place close to the 1st fold in the bias tape.
After you’re done stitching, refold the bias tape and stitch along the fold, catching all of the layers as you sew.
Press.
To make the casing at the top of the dress. Press under the top edge of the dress 1/4″.
Fold the fabric down 3/4″ and press again.
Stitch in place close to the folded edge.
Feed your ribbon through the casing on the top of the dress starting at one side and going around the other side ending where you started. Pull on the ribbon to “gather” the top of the dress.
Place a stitch through the center of the back of the dress to secure the ribbon in place (it’s always a good idea when making something for a small child to stitch ribbon in place so they can’t pull it out of the casing creating a hazard).
Trim the ends of the ribbon and you’re done!